


post filed in:
High Dynamic Range (HDR) and Aperture Priority Mode | Landscape and Urban Photos That Really Pop!
Ever since I got into photography with my first DSLR 6 ½ years ago, I’ve been obsessed with images of people. I became pretty comfortable photographing people in different lighting situations, but I focused so much on them that I never learned how to take good landscape/urban photos until this year! It has been one of my goals because my husband and I love to travel and I wanted to be able to better capture our adventures.
I have always known what HDR is, but never realized how simple it is to accomplish well before now. I’m excited to share this trick with you that COMPLETELY transformed my landscape and urban images within a couple days of learning it!
High Dynamic Range (HDR) Definition – in my own simplified words:
Multiple exposures combined into one image to capture the most detail in each element of the scene.
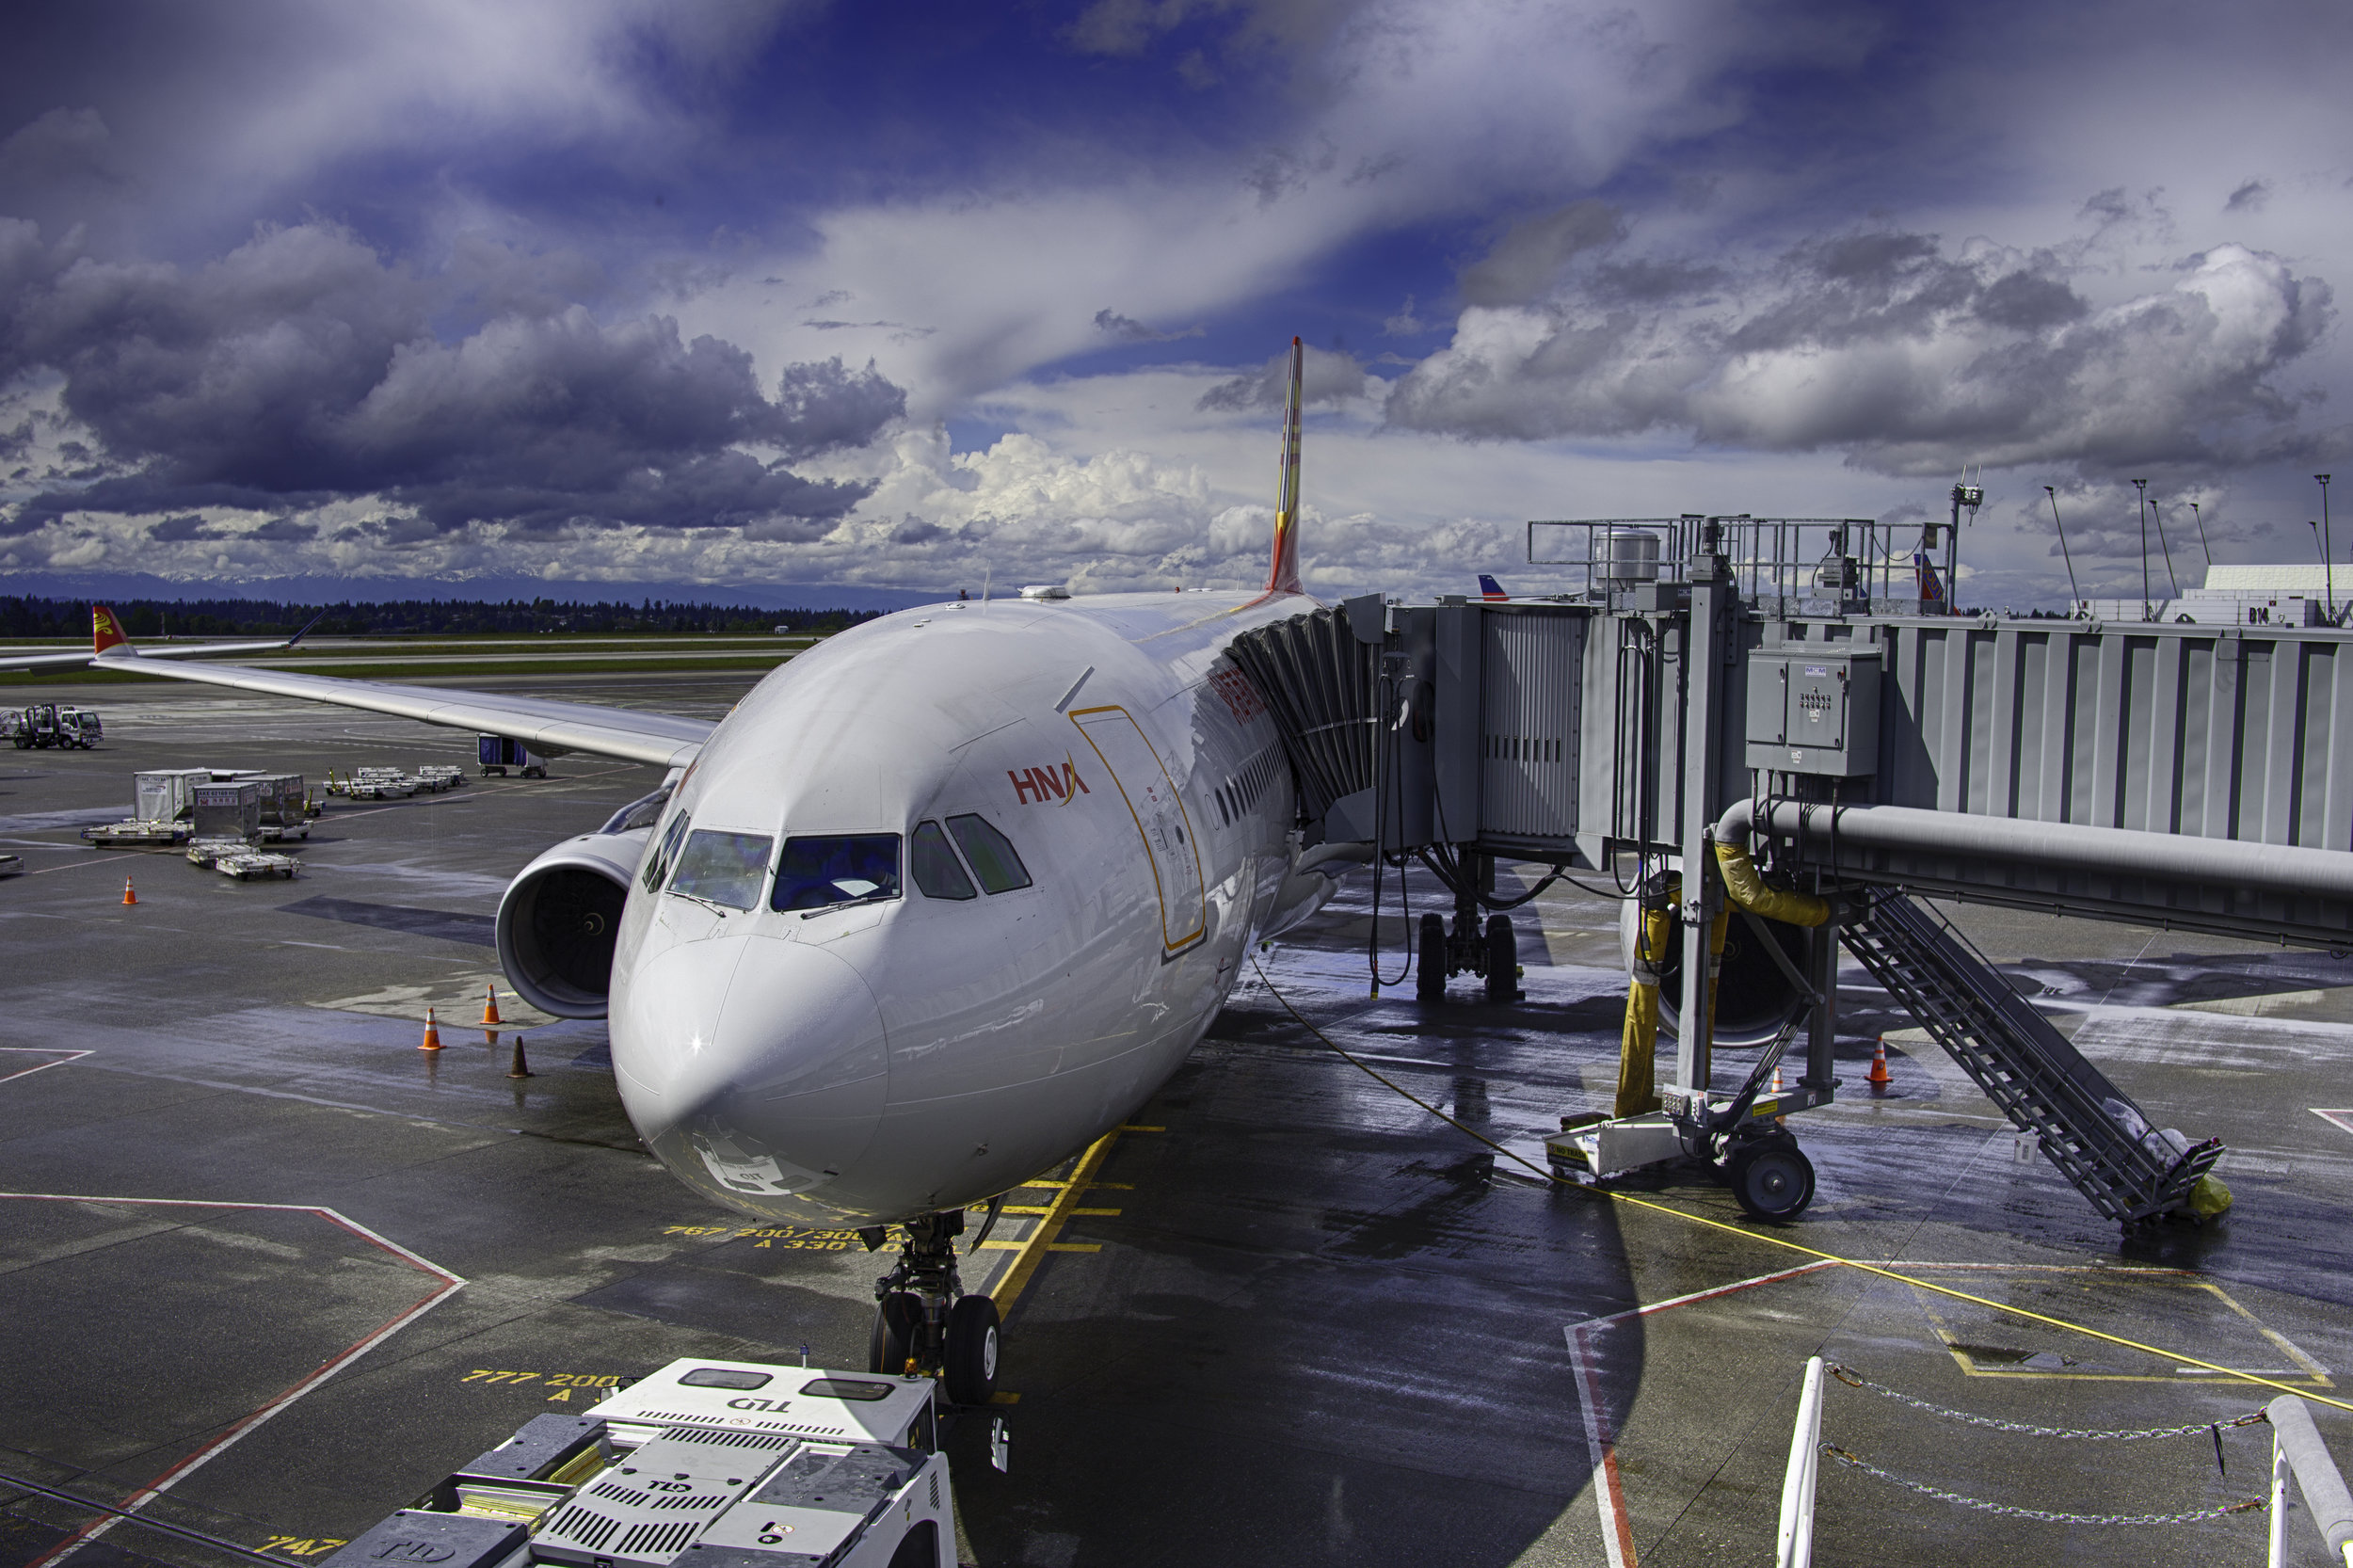
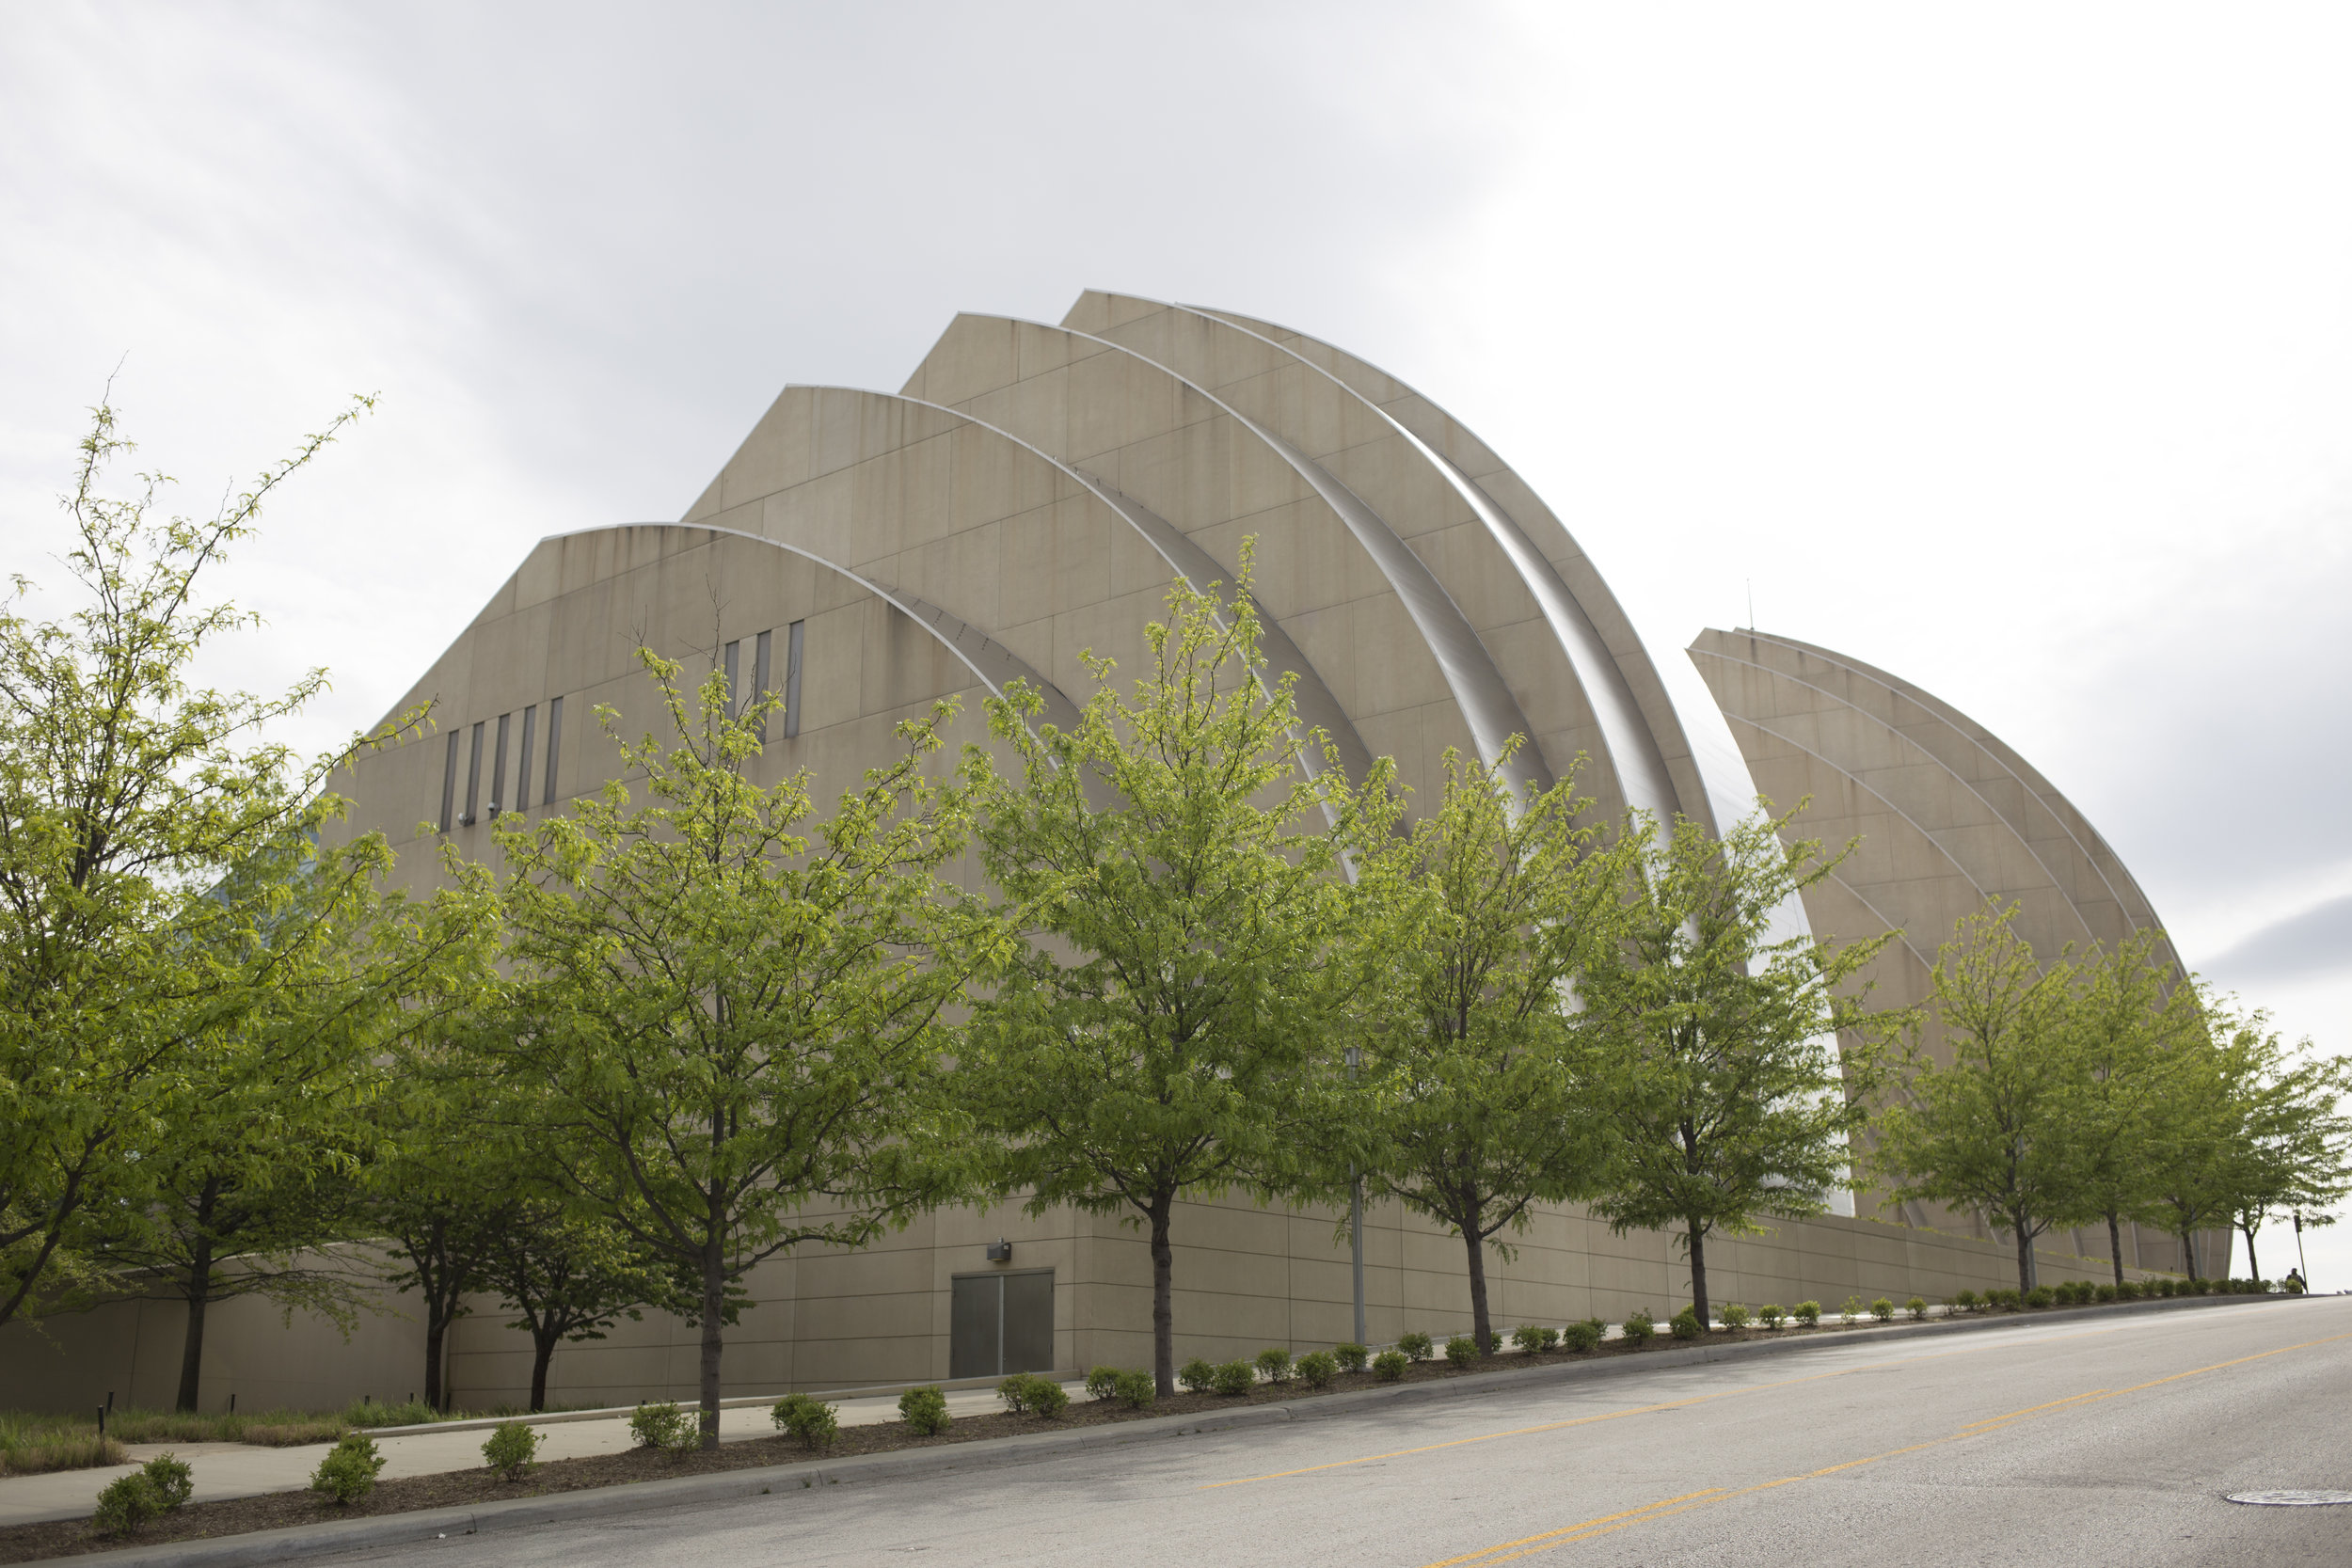
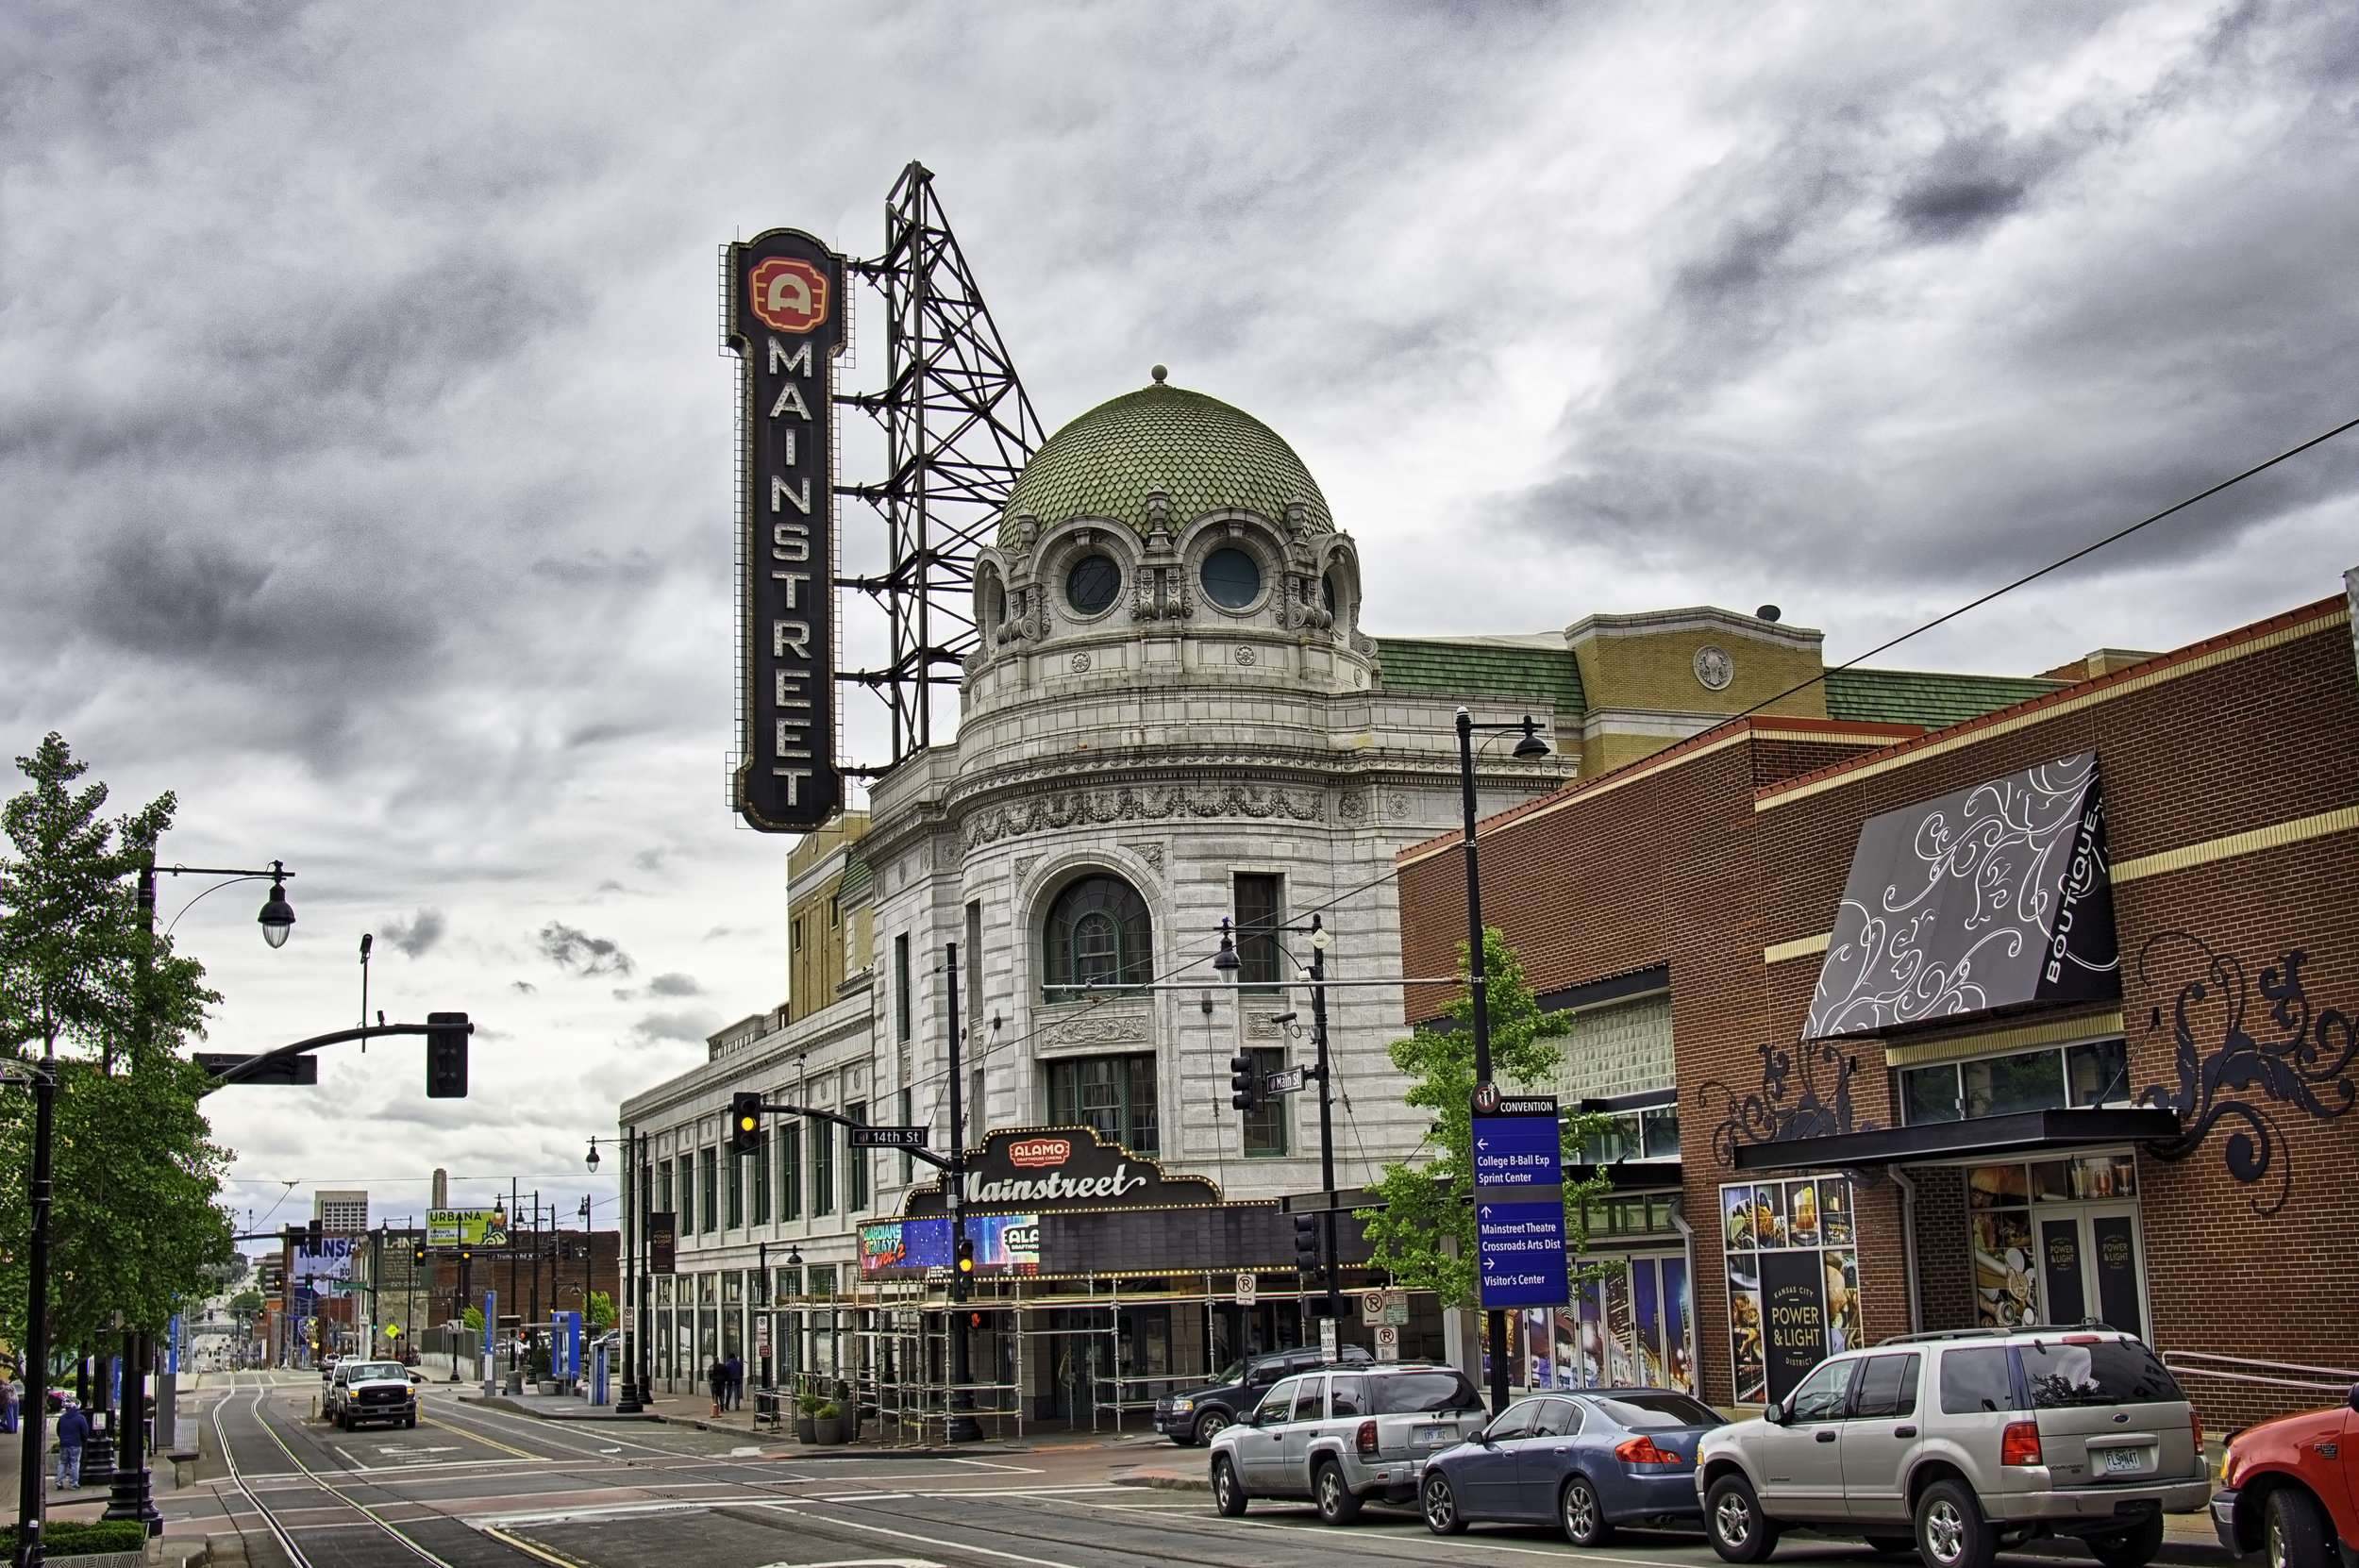
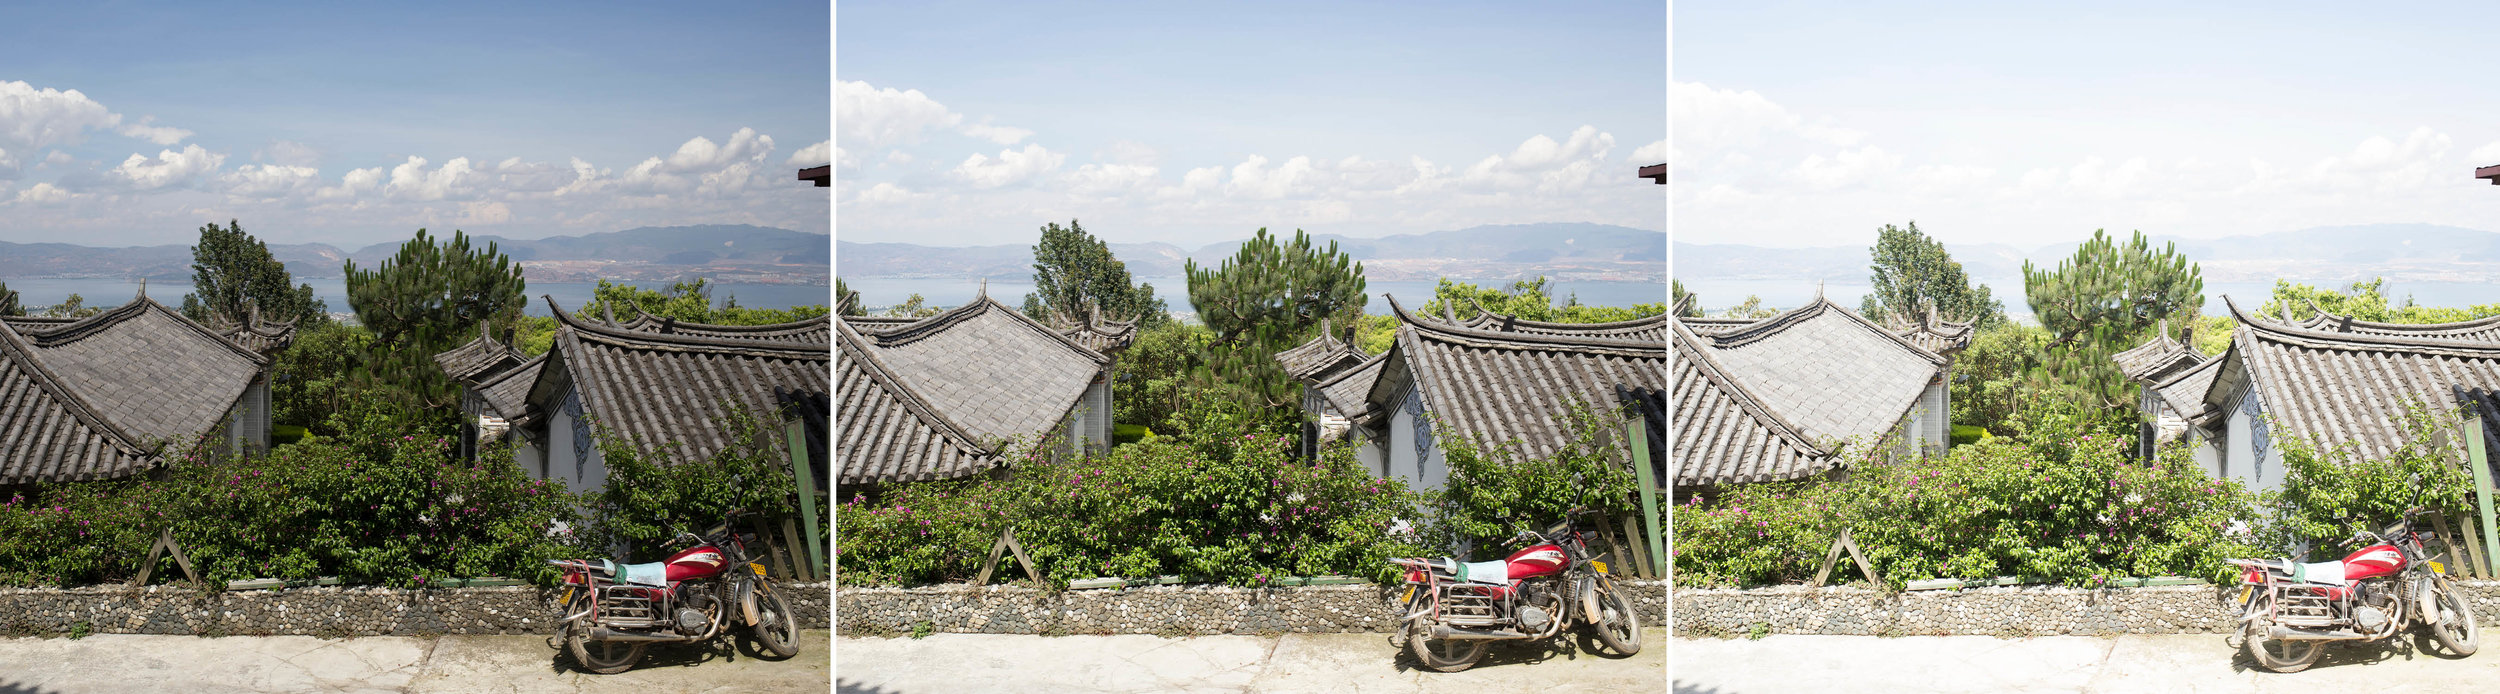
For example, imagine it’s mid-afternoon on a sunny day with a few clouds here and there and you are trying to photograph the side of a building that is shadowed. The very best exposure you could manage with one image would be a balance between the darkest and lightest parts of the scene and would most likely get something like this straight out of camera:
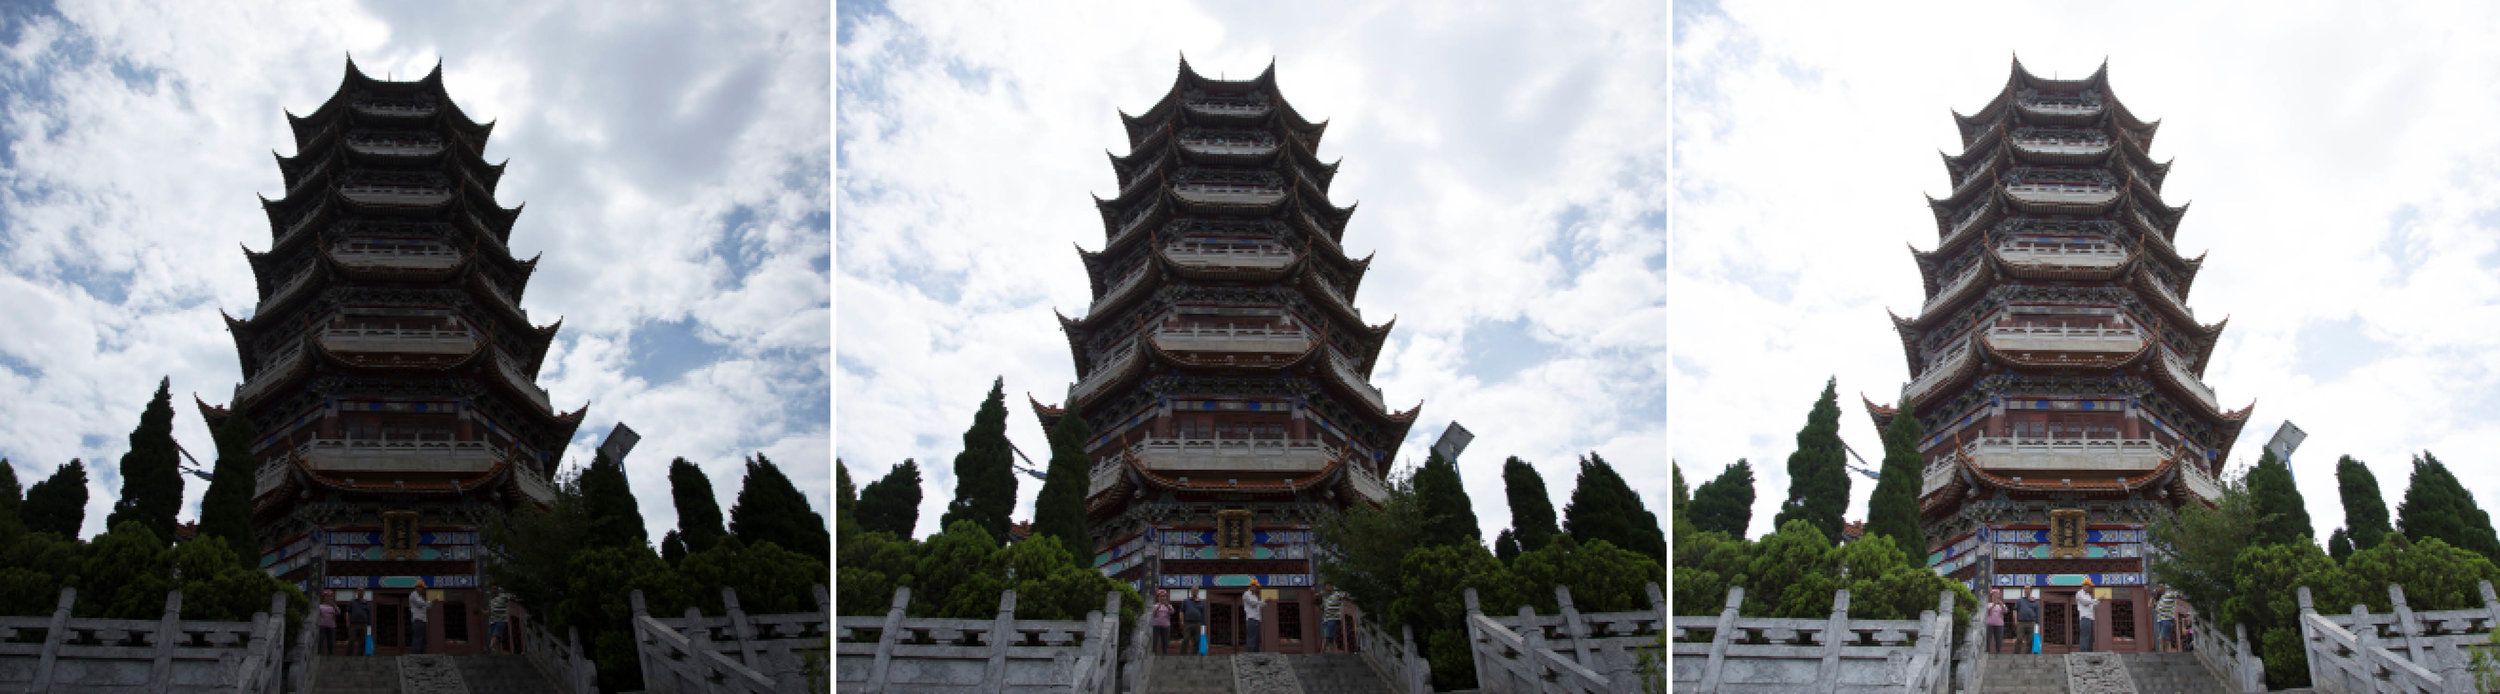
However, if you take one underexposed image to capture the detail in the sky, one balanced one like above and one overexposed image to capture the detail in the shadows…
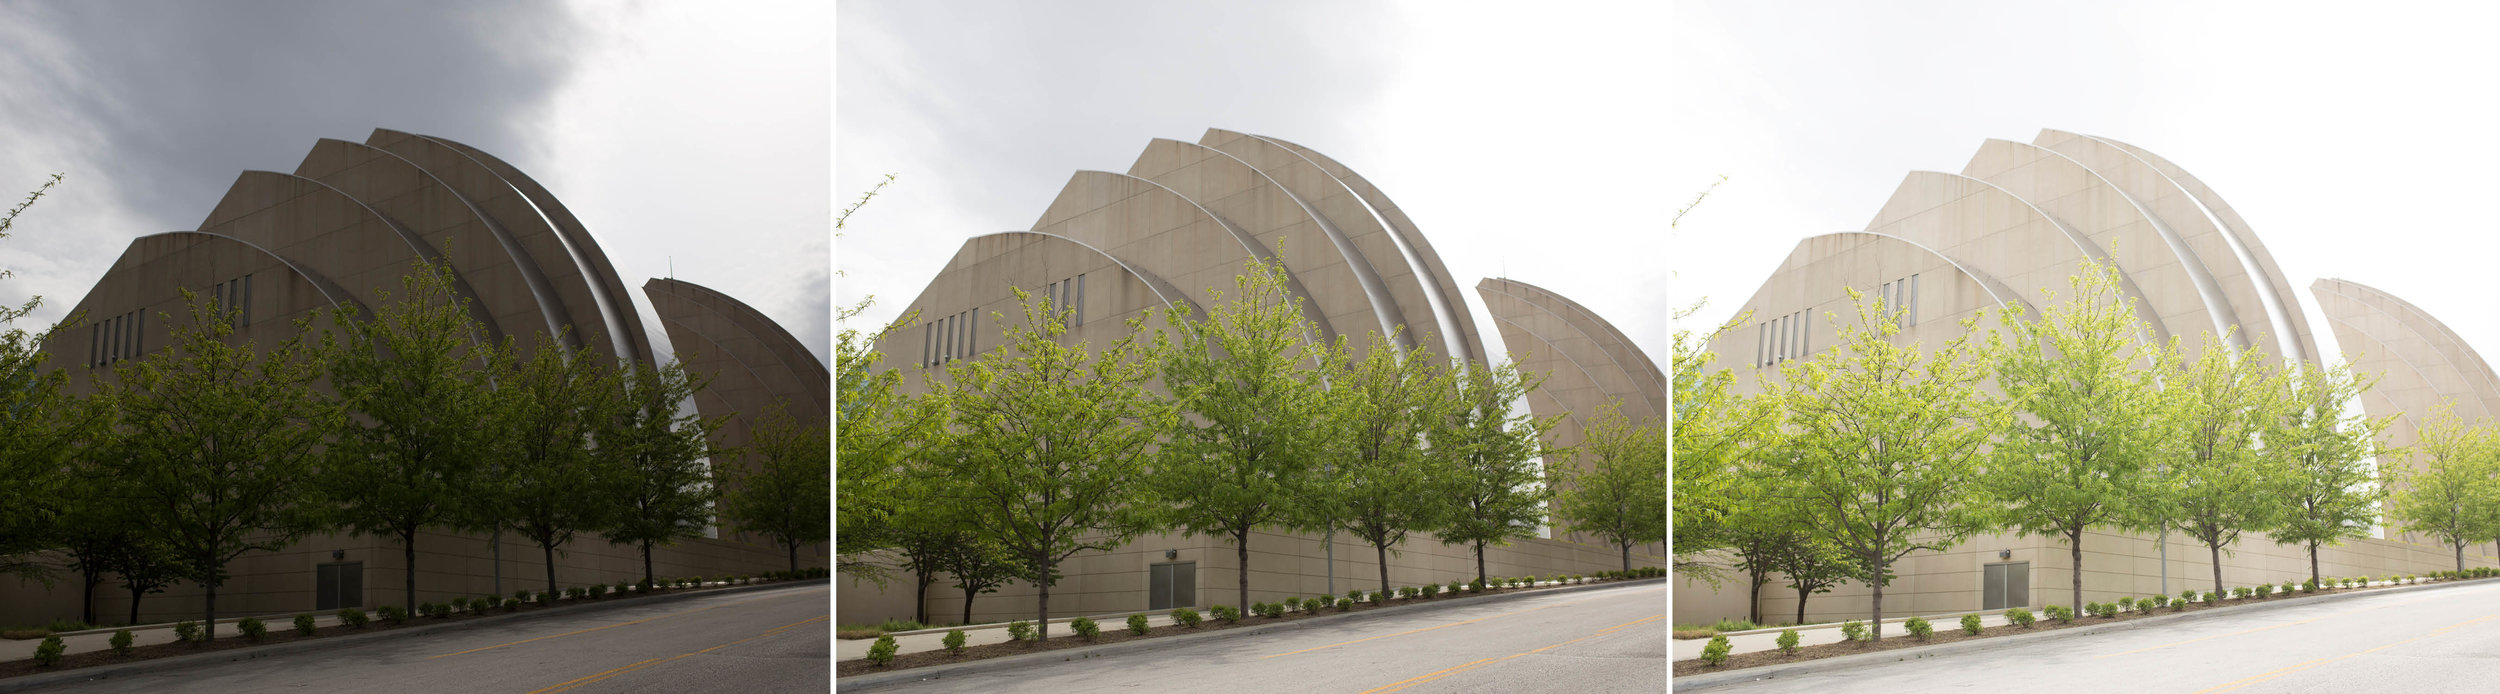
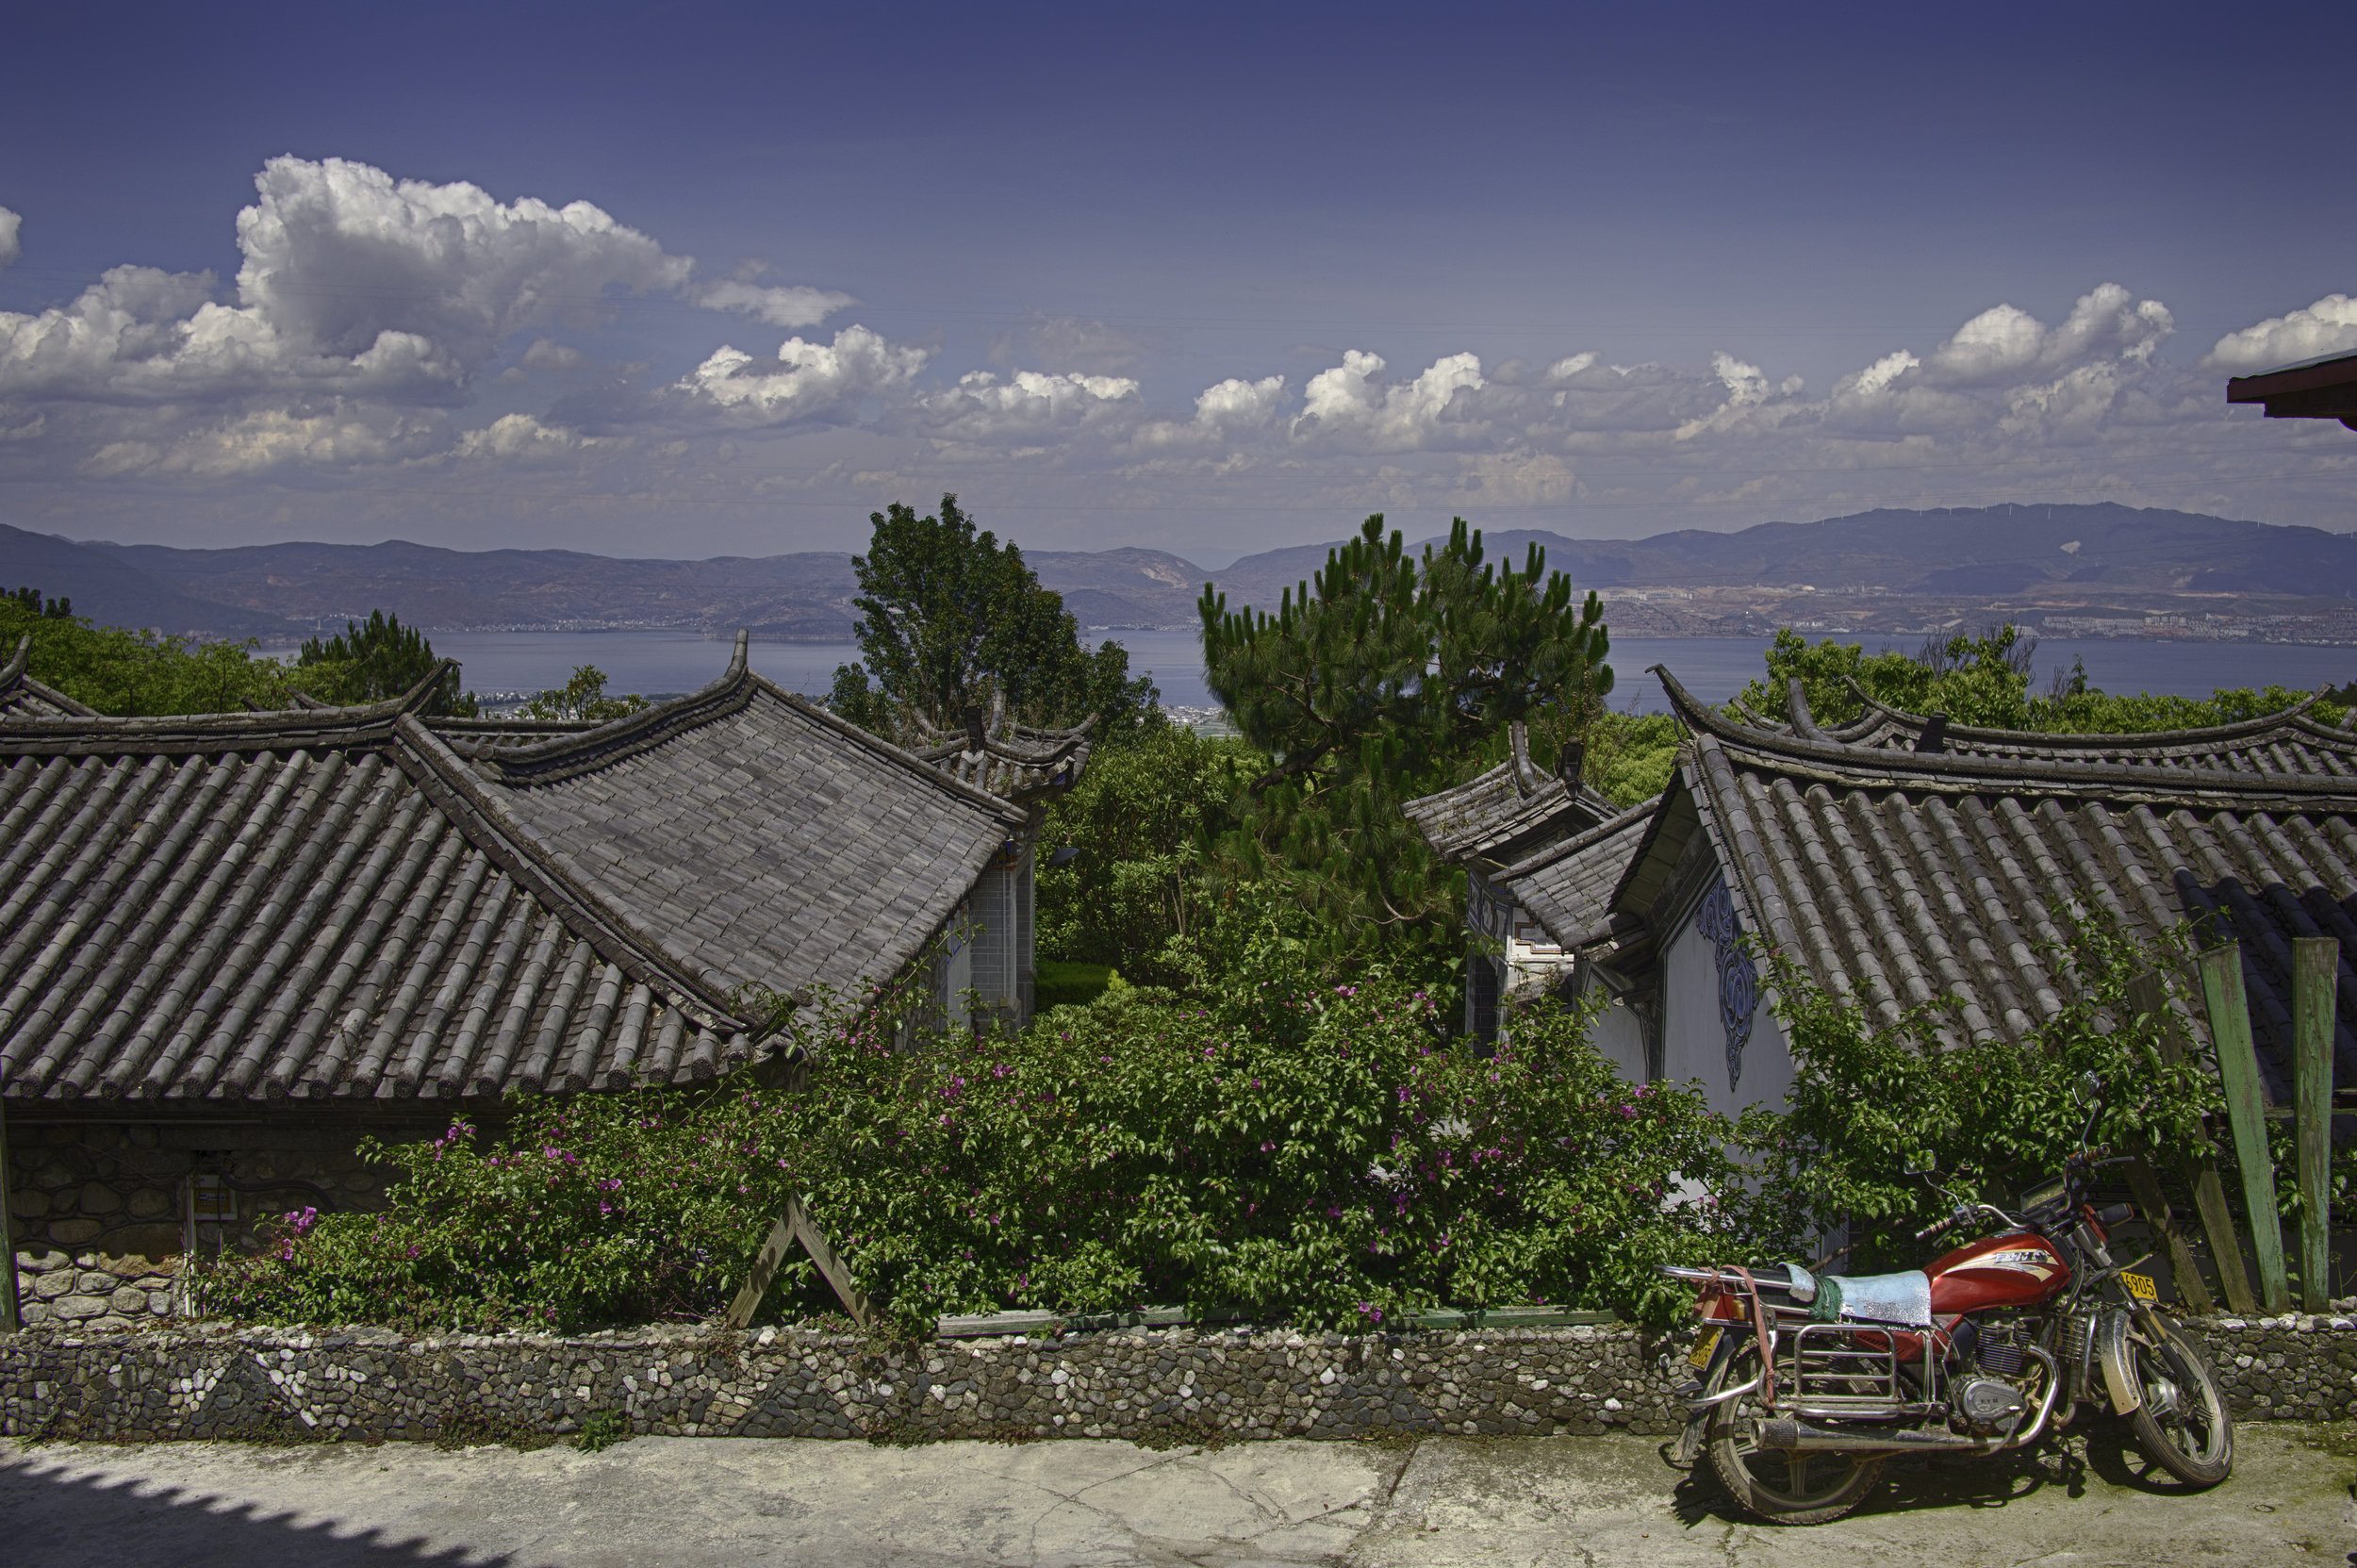
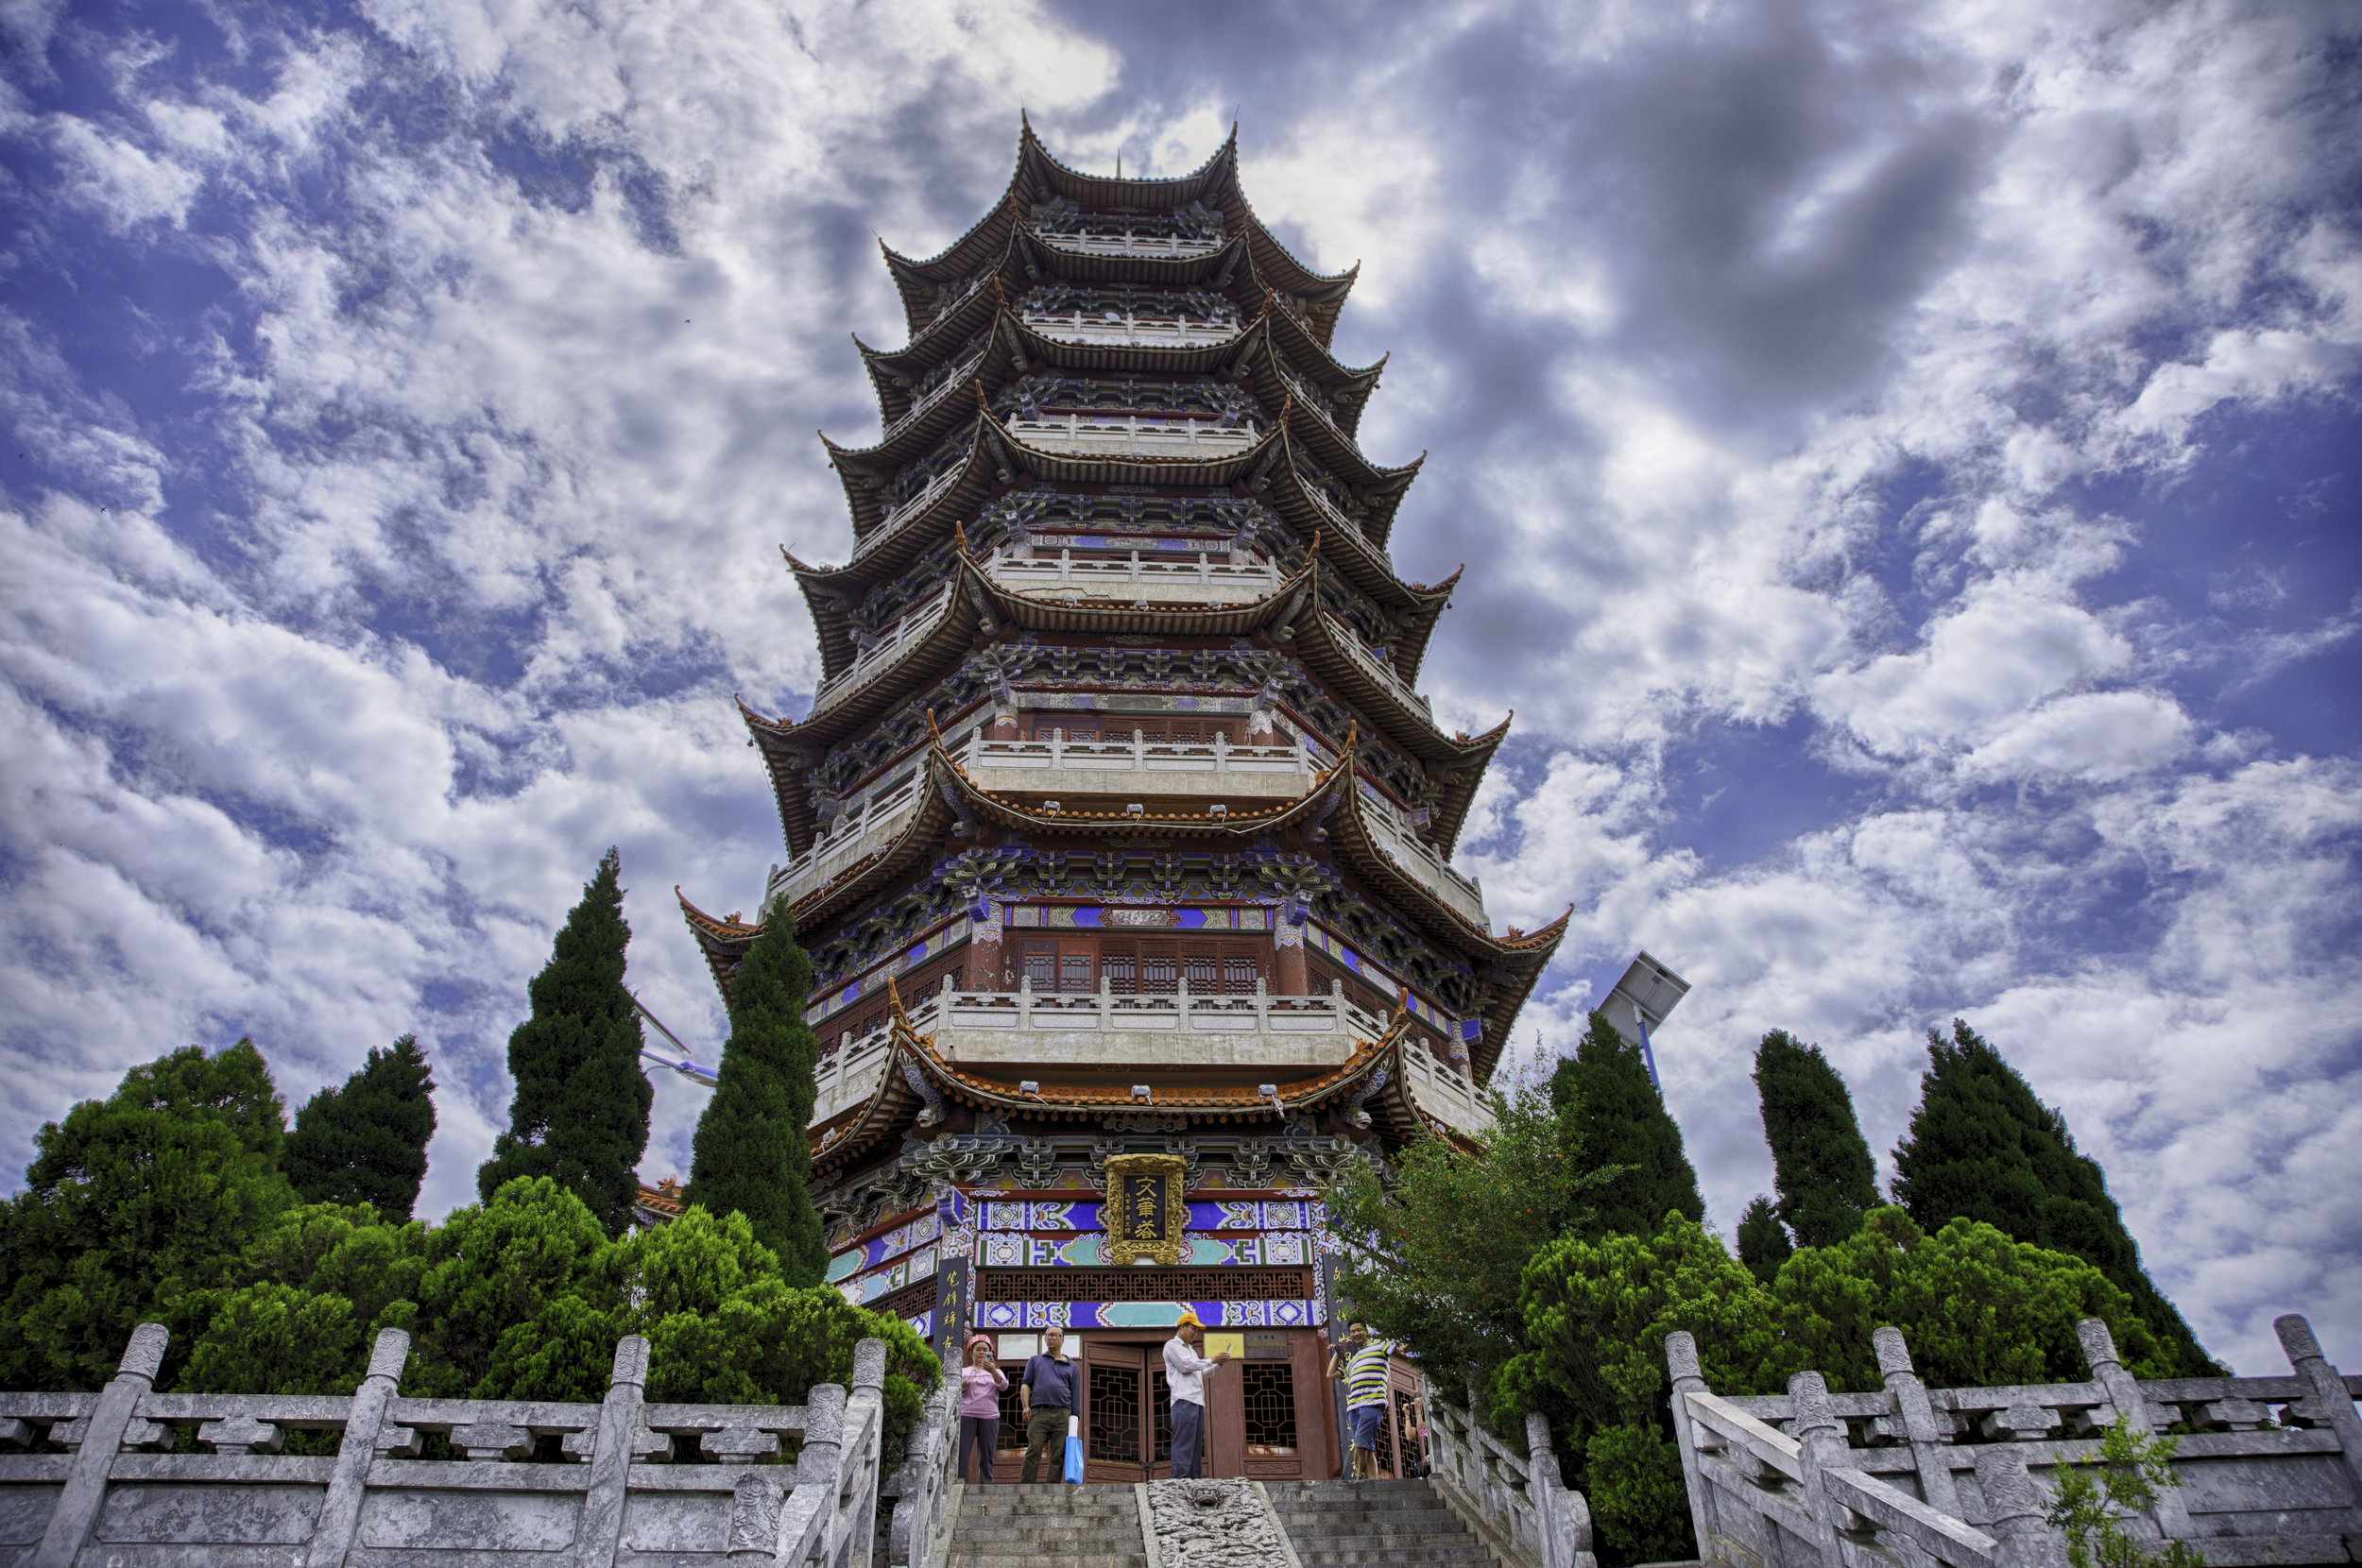
…you can combine them to create something like this:
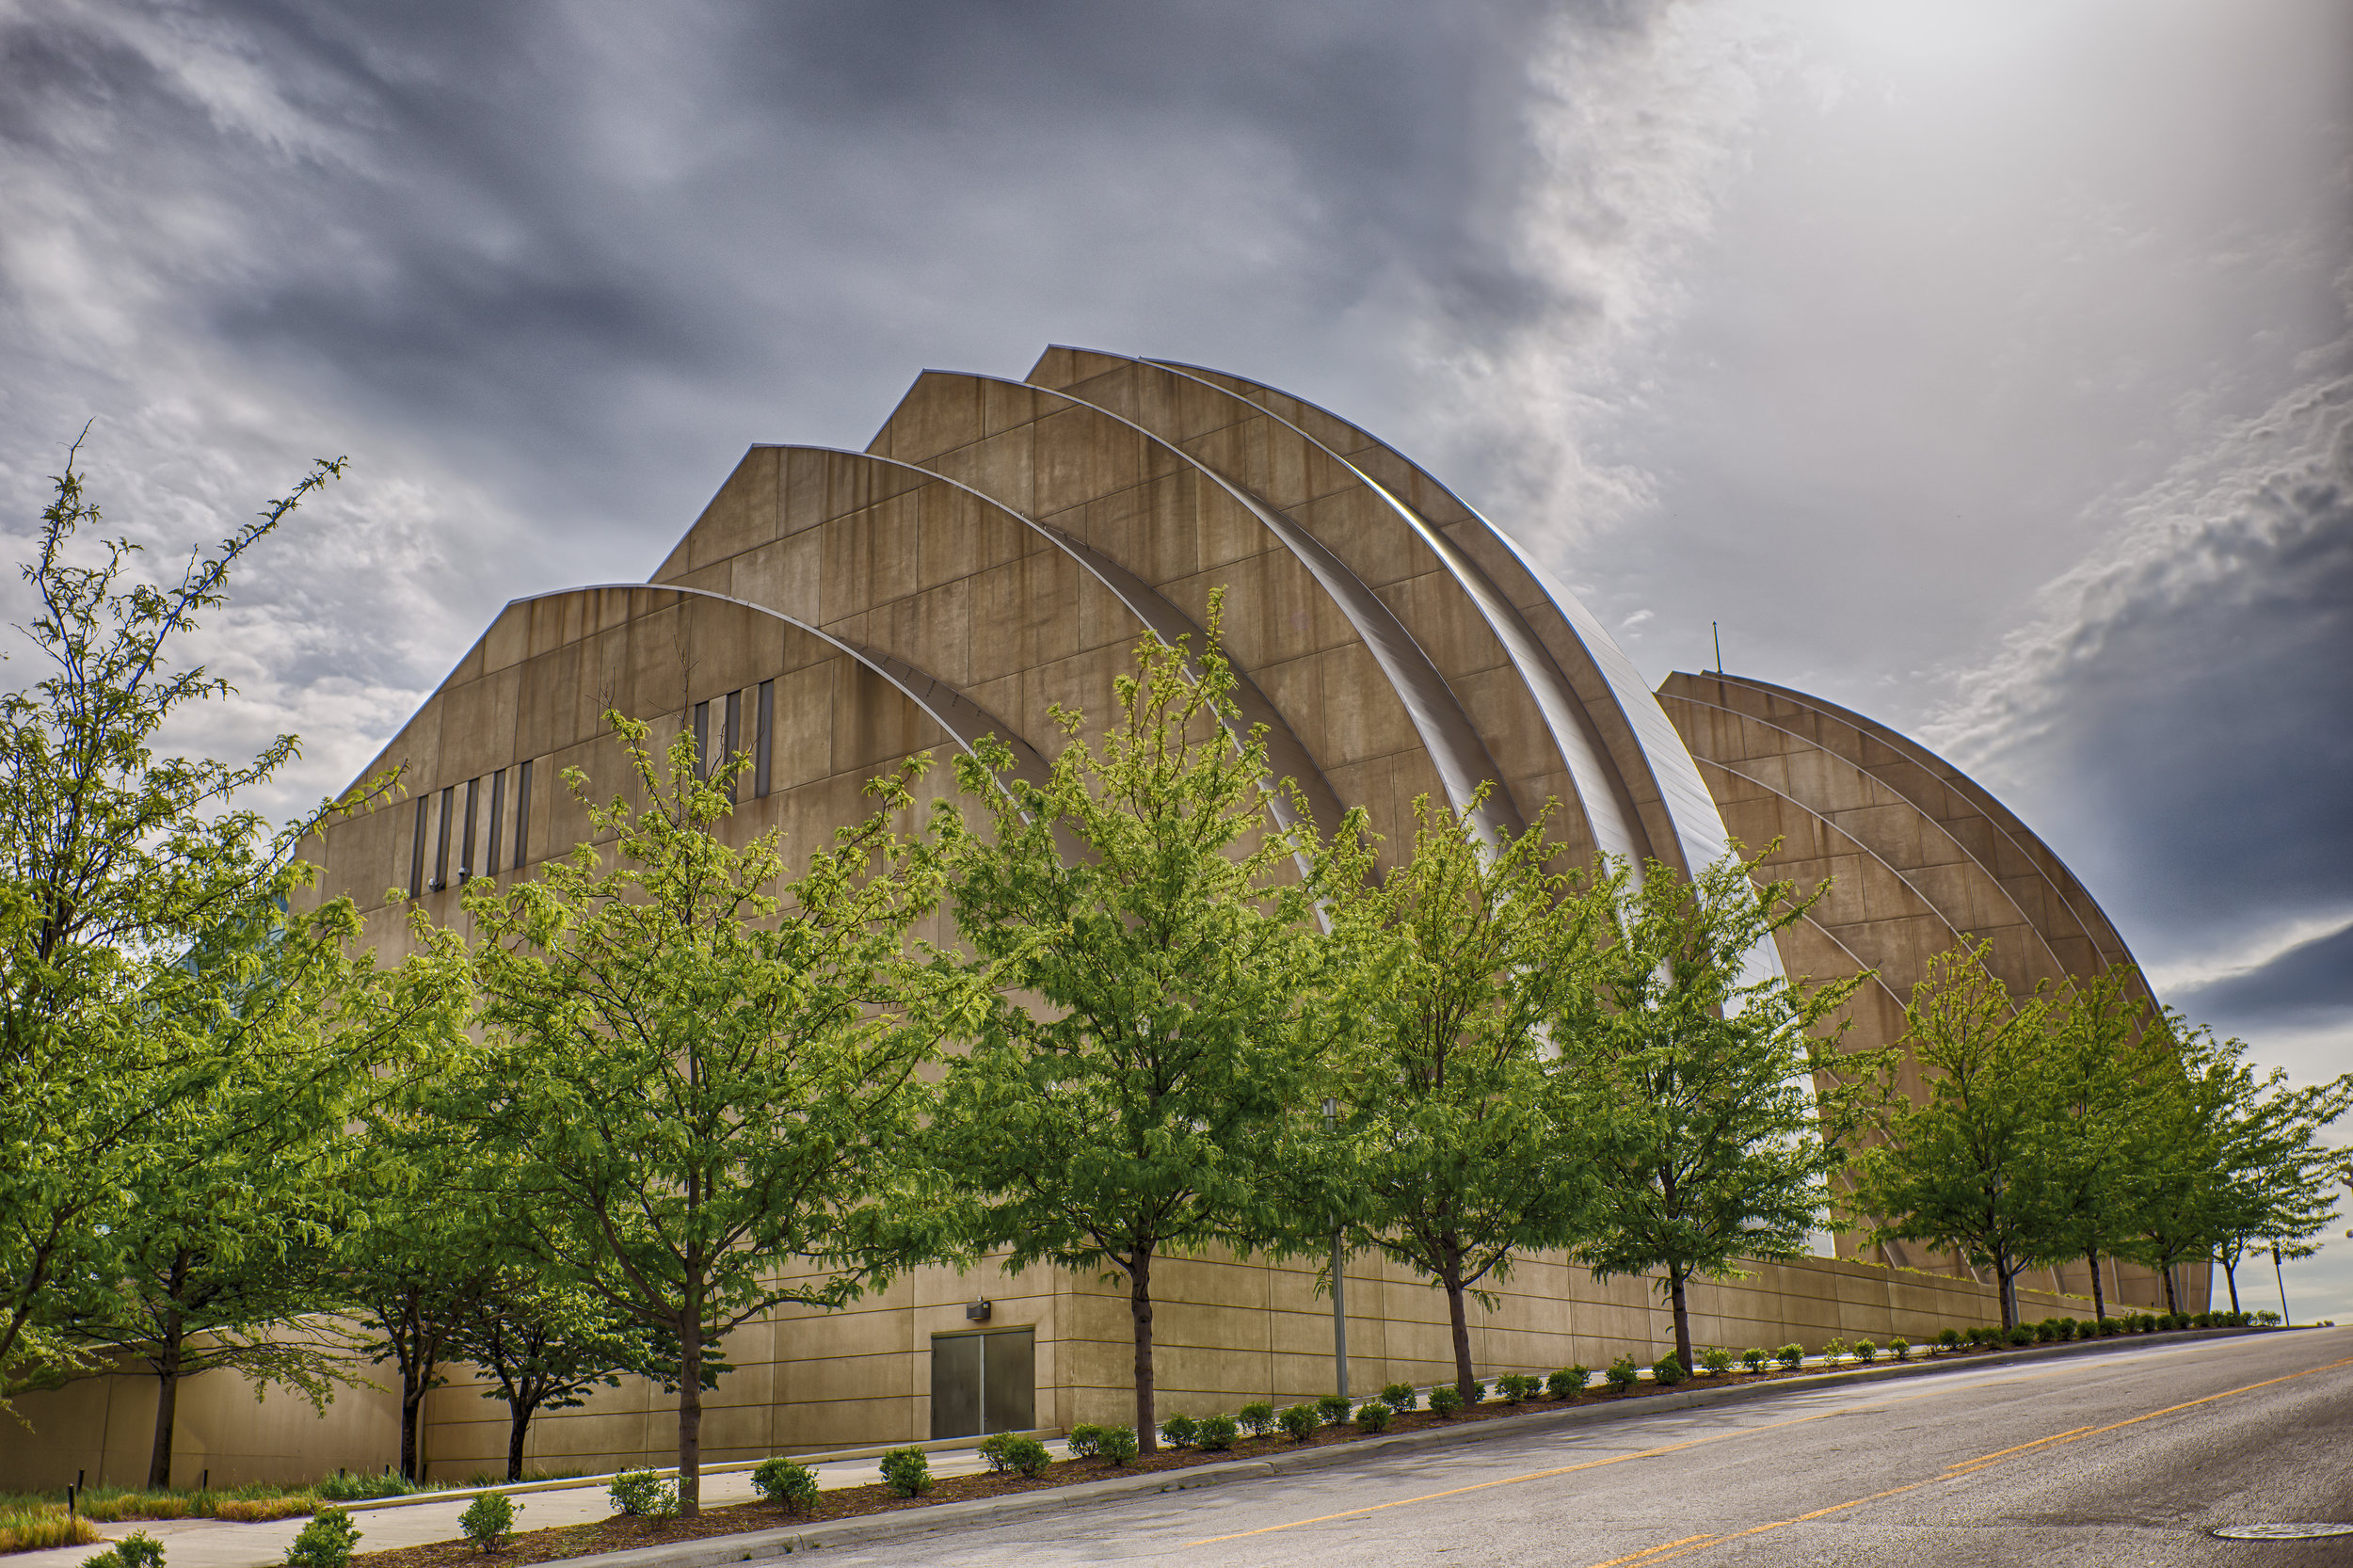
Big difference, right?? Given, that last image has been post processed, but you can tell that there is no way the original image would end up looking that detailed or have as much ‘pop’ as the final one.
Things to know about HDR:
- It doesn’t work for situations with a moving subject unless you are purposely trying to achieve motion blur for creative purposes, this is for stationary scenes
- In my opinion, it works best on partially cloudy days where you can see some of the sky through the clouds – the more depth between highlights and shadow, the better!
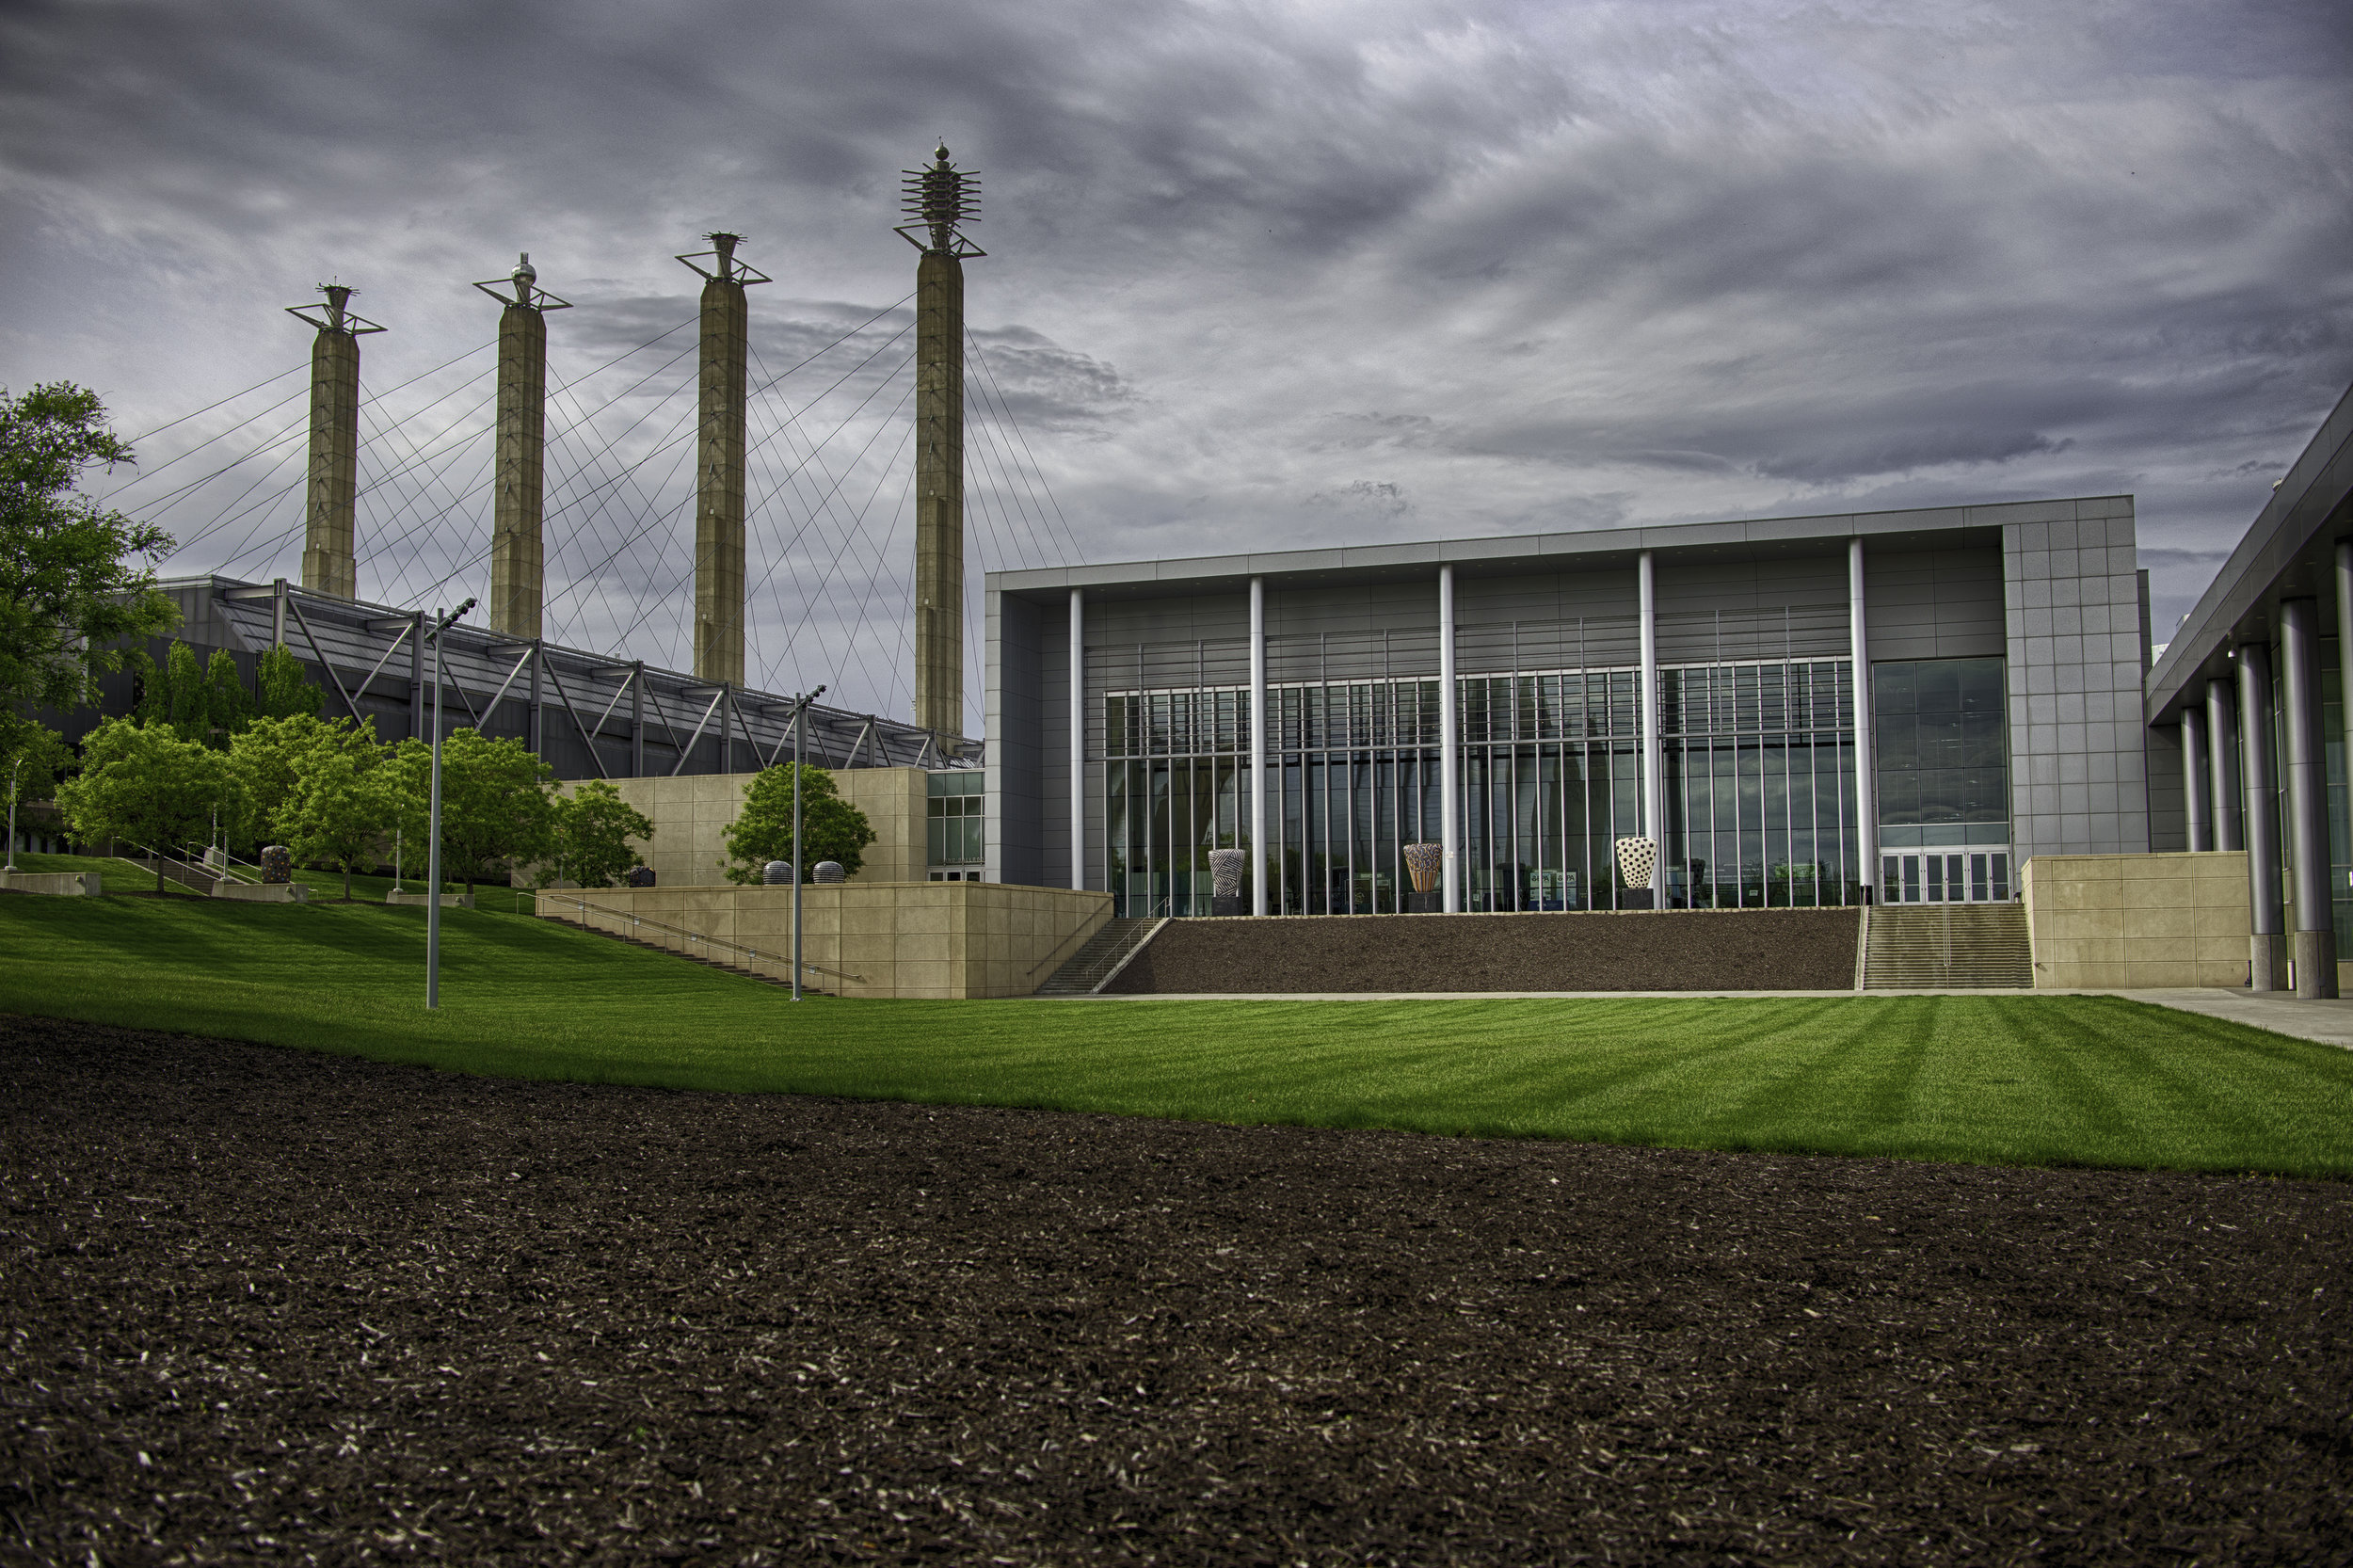
- A sturdy tripod is very helpful for these, but it is a myth that they can’t be achieved without one. If you are careful with settings (not letting your shutter speed get too slow), it is so simple. In fact, I took every image in this post hand-held, except for the first example of the Kauffman Center for Performing Arts.
- You can certainly combine more than three images at light intervals that are more spread out, but this is a good place to start
APERTURE PRIORITY MODE
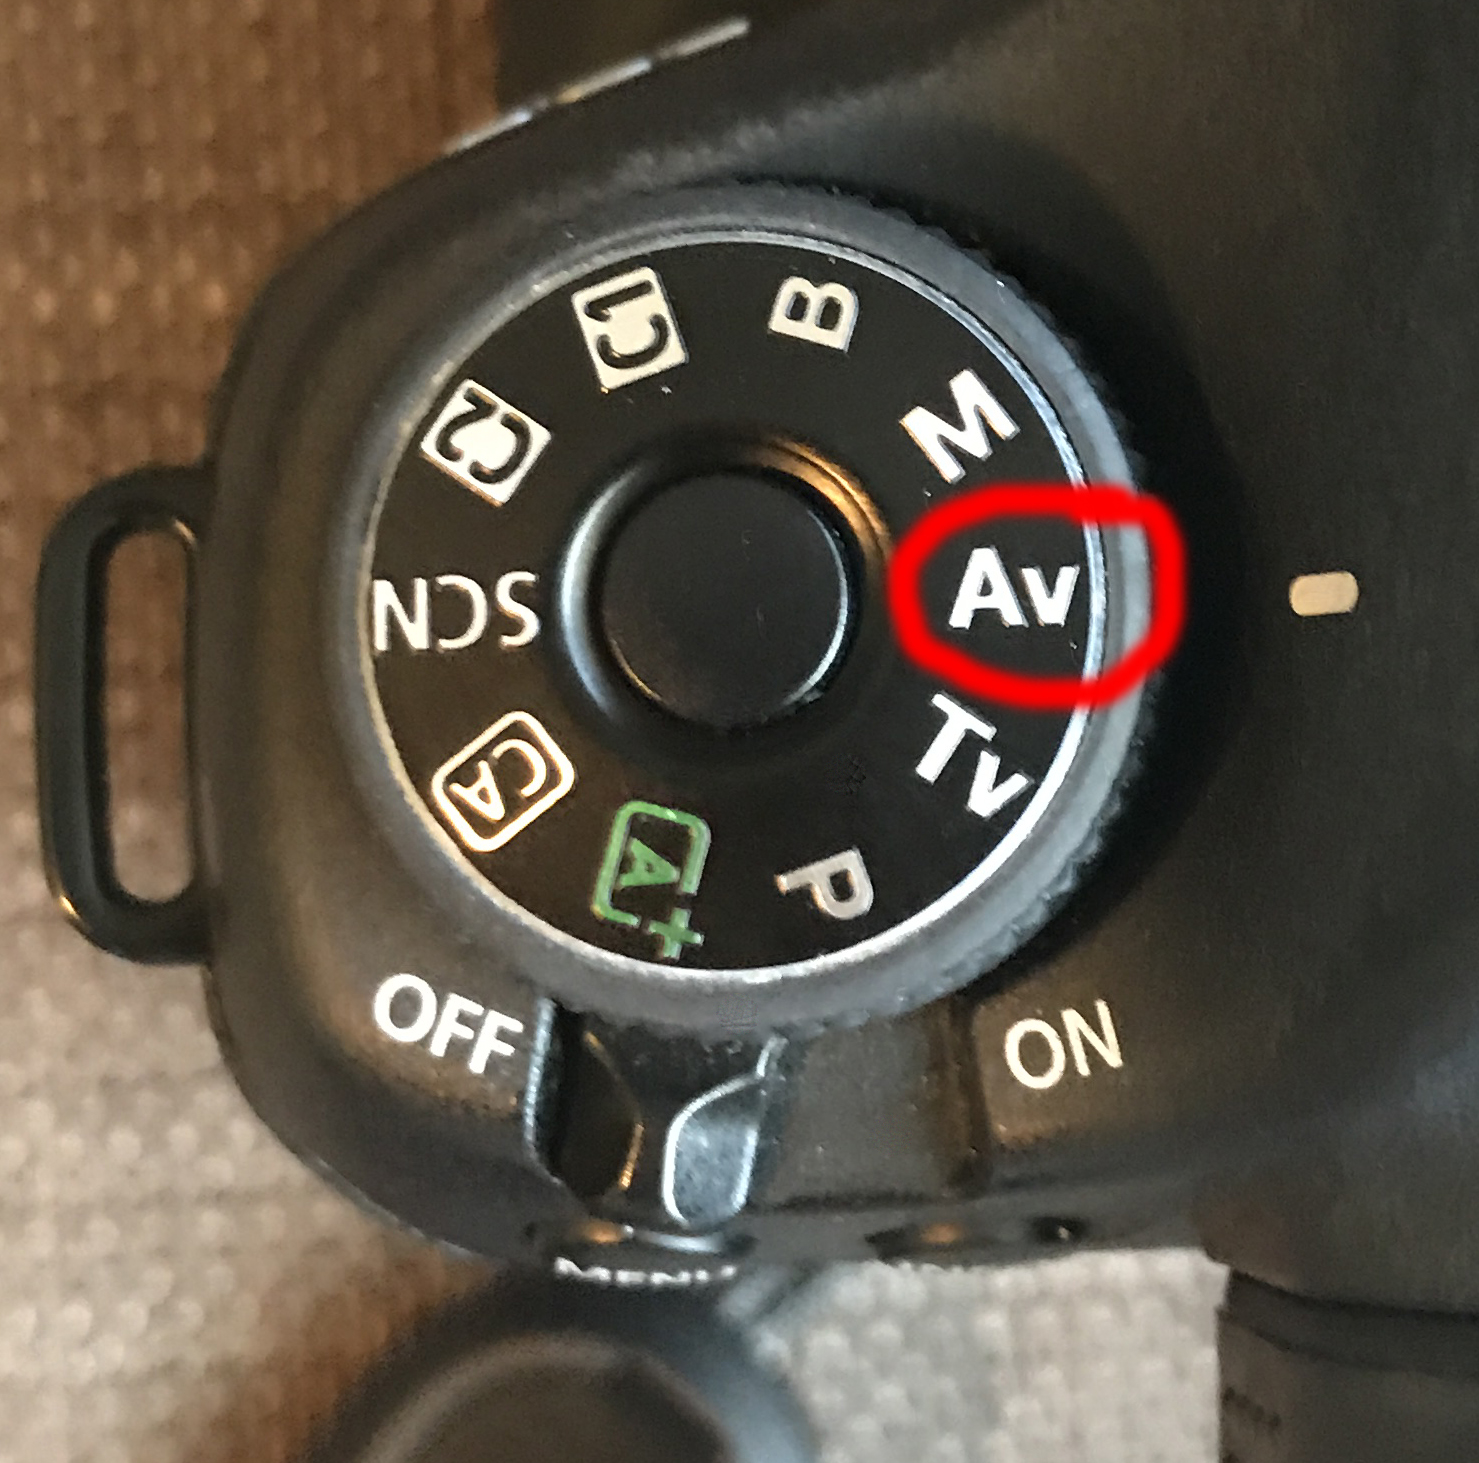
In my experience, the simplest way to achieve this is to use Aperture Priority Mode (A on Nikon, Av on Canon) and the Auto-Exposure Bracketing option in your camera’s menu settings.
Many new photographers go from using Auto to Aperture Priority Mode (you set the aperture and the camera automatically selects the appropriate shutter speed to get a properly exposed image) to Manual, but when I started learning, I went straight from using Auto to using Manual mode so understanding Aperture and Shutter Priority has been an interesting challenge! Aperture Priority has already been so helpful and as soon as I get comfortable using it with my external flash, it may be my go-to!
Here is the thing about this mode that confused me at first: you set your aperture, but then your camera will often decide that the shutter speed needs to be way too slow to shoot hand-held in order to achieve the correct exposure for the scene (typically in low-light situations). I never shoot hand-held slower than 1/60 for my shutter speed and usually even faster if I’m using a long telephoto lens to avoid camera shake and blurry images. The trick to fixing this issue is to just increase your ISO because it will force your camera to speed up the shutter speed to compensate… it’s that simple!
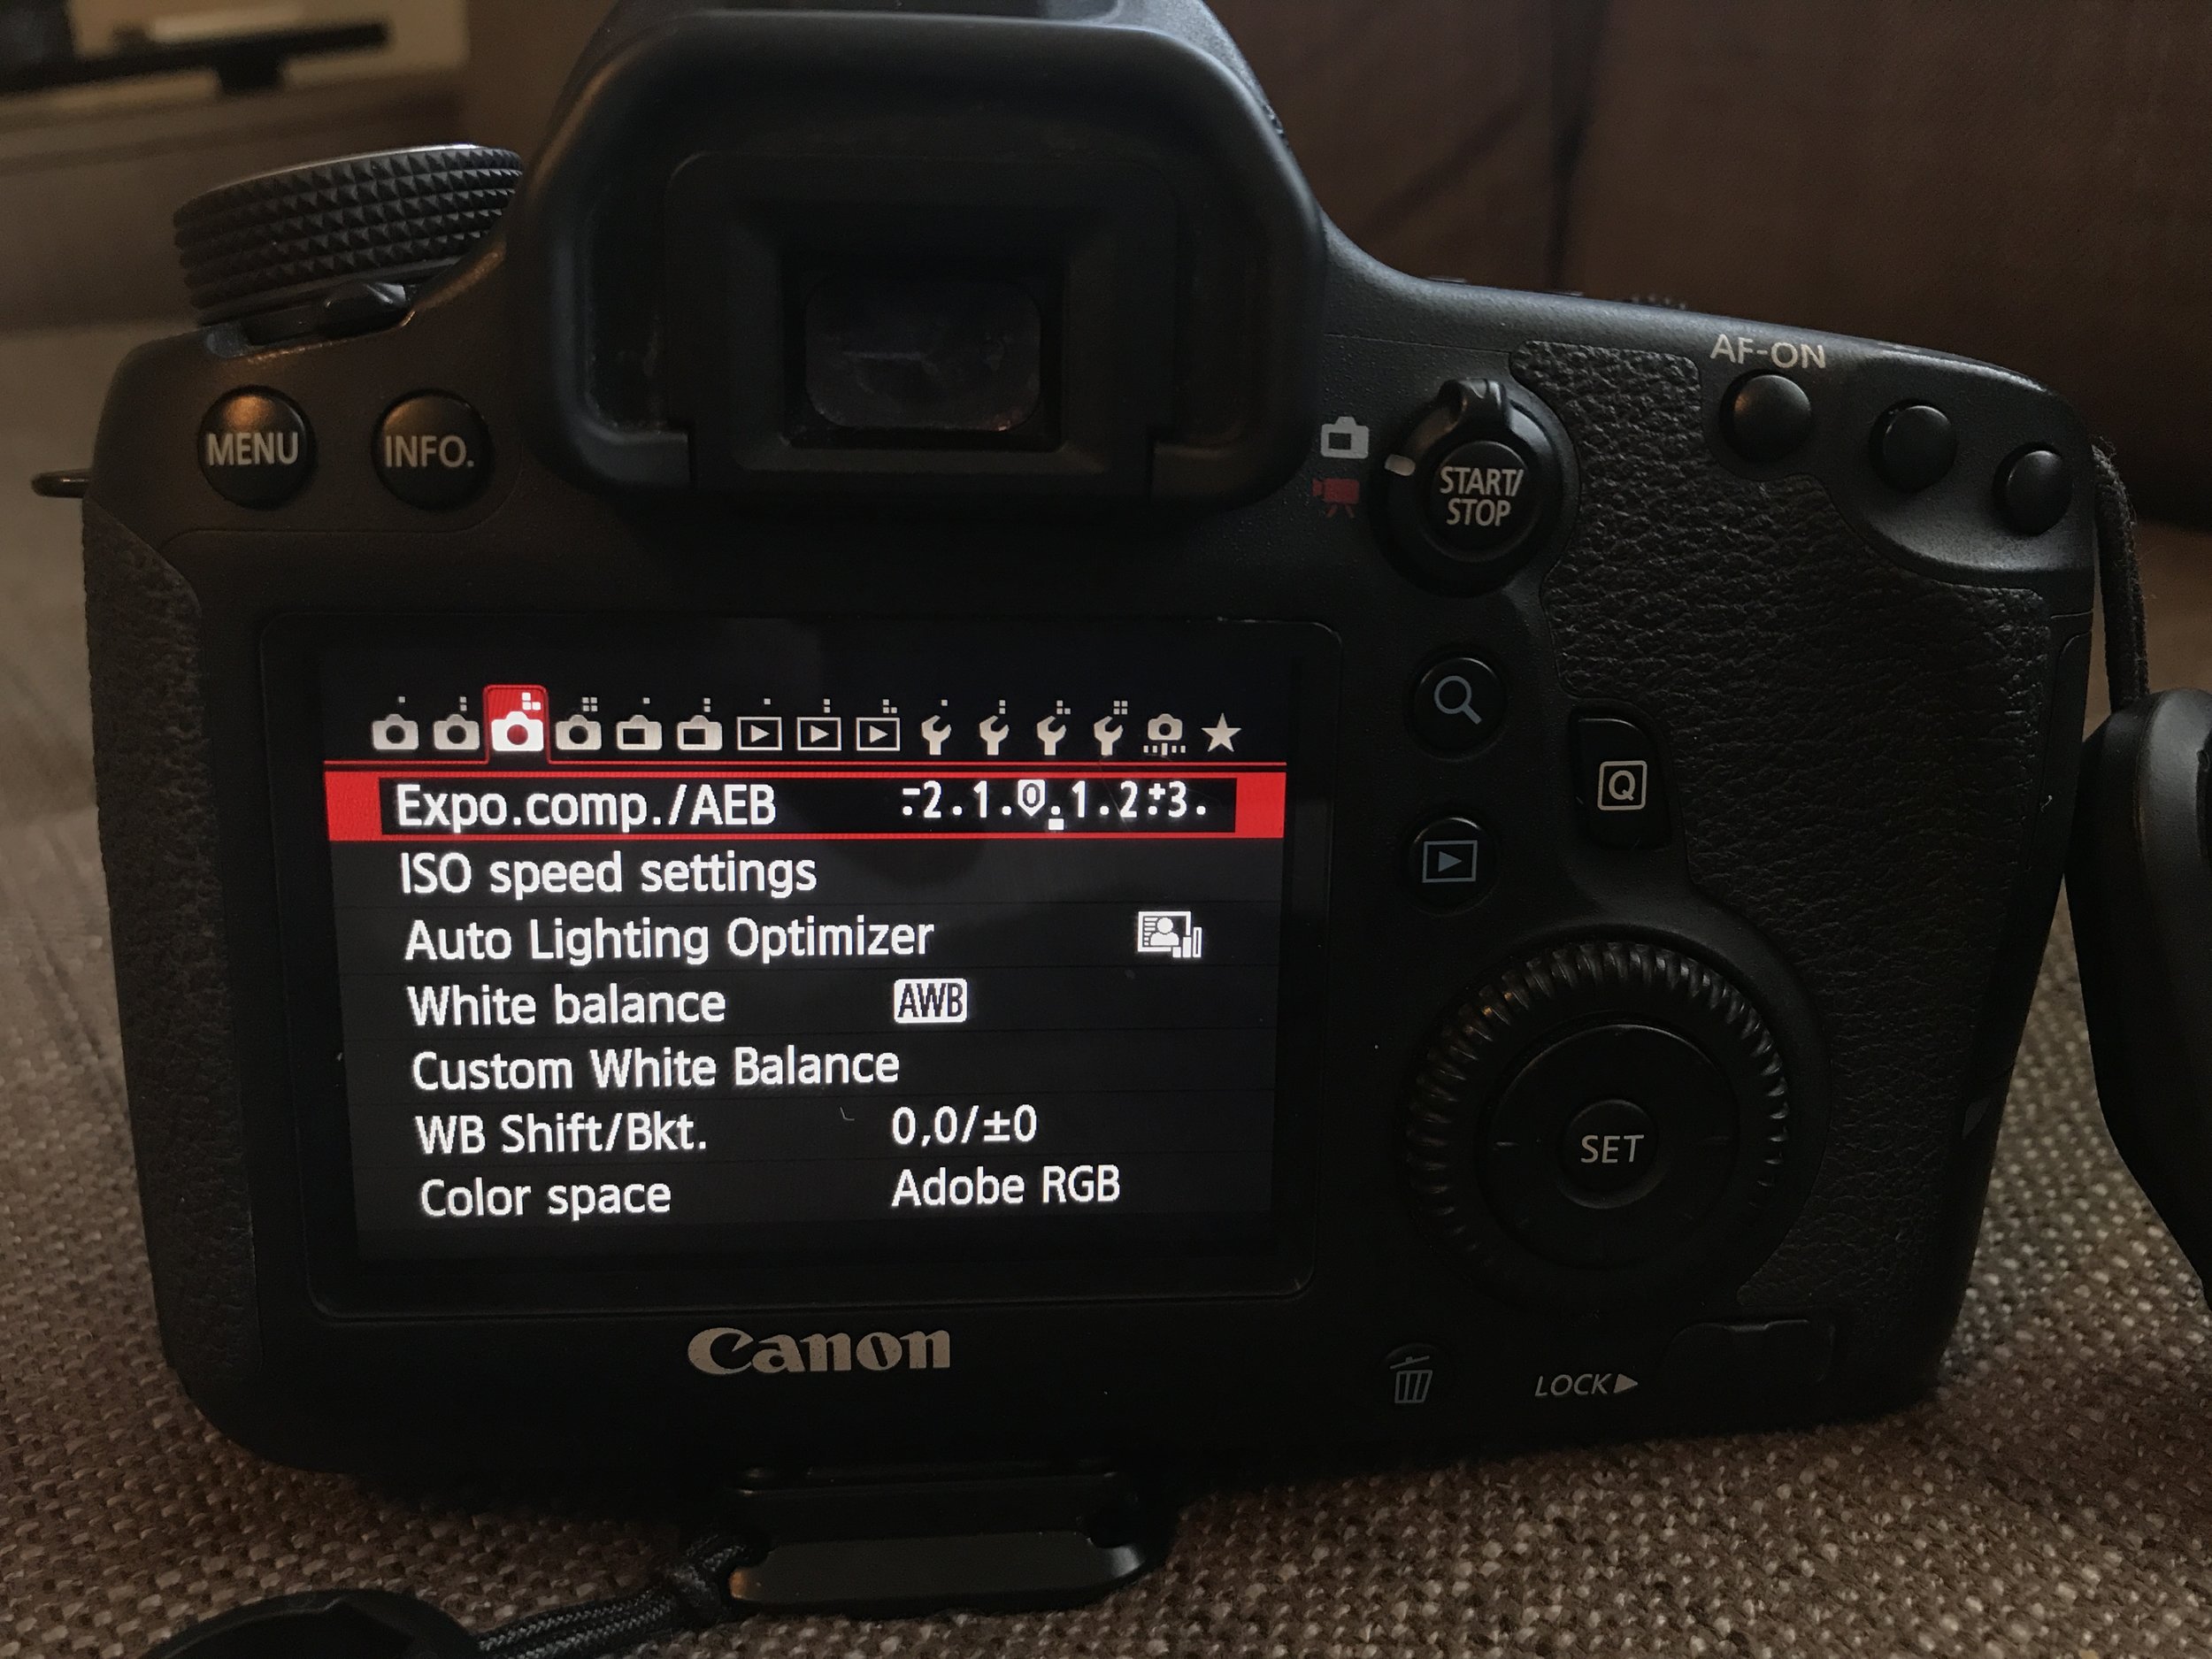
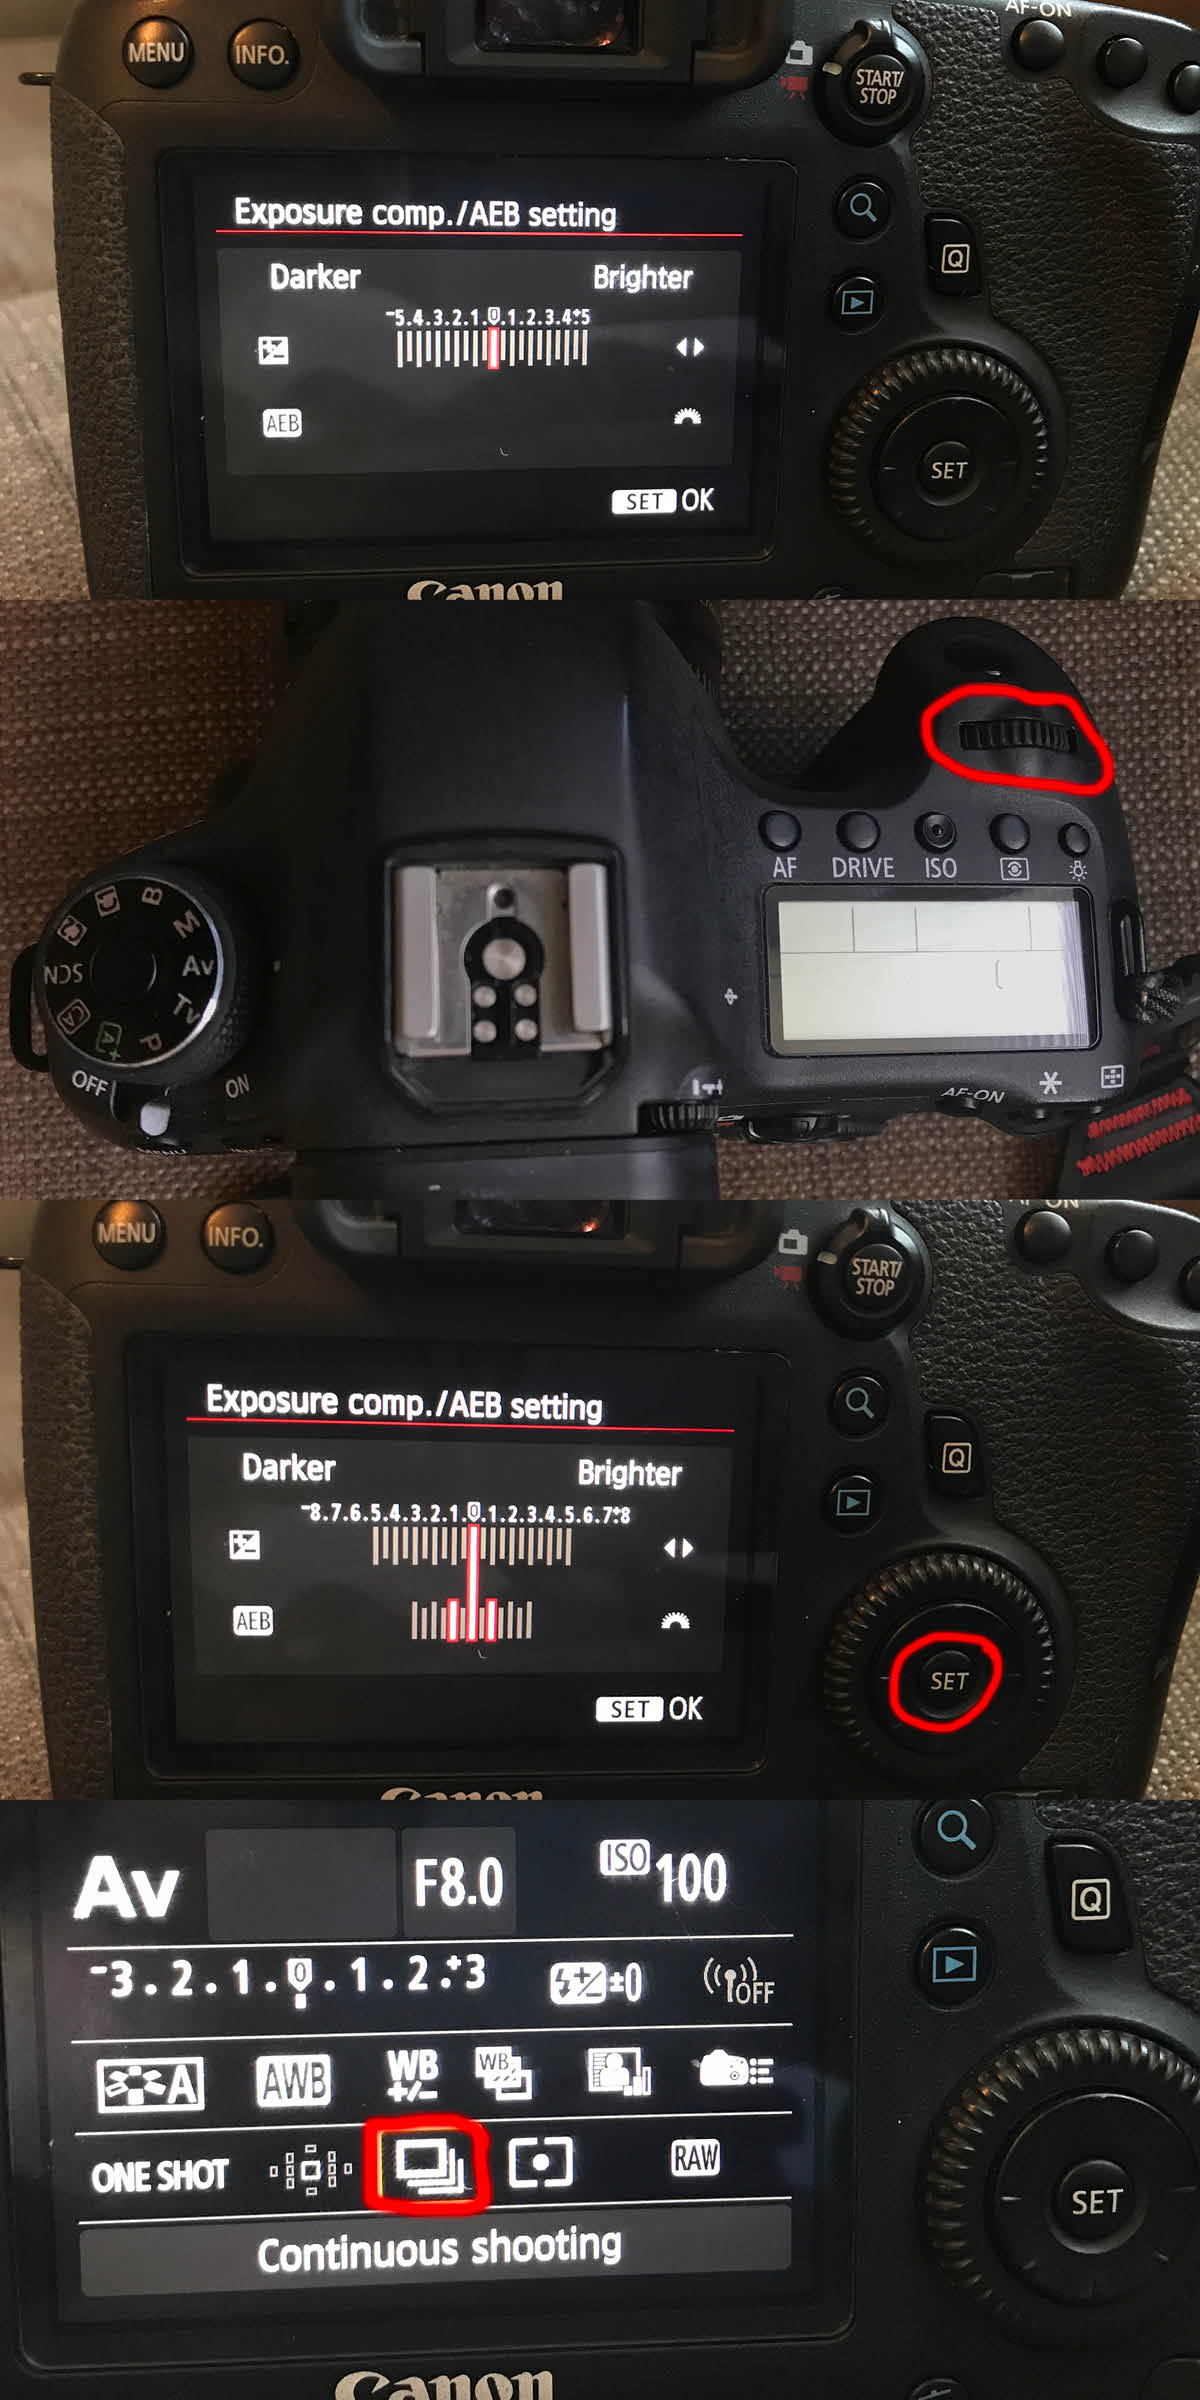
The other MUST KNOW fact about Aperture Priority comes in to play during the times when you don’t agree with your camera on what it thinks the ‘correct’ exposure is. Every time you adjust your ISO or aperture, your camera will compensate to keep the exposure level the exact same. However, you can override this by finding something called “Exposure Compensation/Auto Exposure Bracketing” in your camera menu. It is literally just a scale that you move right to make it think the exposure needs to be brighter or left to make it darker. This is also where you will set your exposure bracketing for HDR.
Okay, take a deep breath… I know this is a lot of information and it may not sound as easy as I said it was. I promise it is, just email me or comment below if something doesn’t make sense – I’d love to chat! After you follow the process a couple times, it will become second nature.
BACK TO HIGH DYNAMIC RANGE
While you have the exposure compensation scale pulled up, use the scroller at the top right by your shutter release button (Canon) to scroll two clicks to the right. You should see two extra tick marks appear on the scale so you have one in the center where you started, another 1 stop underexposed and another 1 stop overexposed. Be sure to click the enter button by your thumb to actually SET this setting (I kept forgetting that step at first). You can set them even father apart and do more than 3 images, but as mentioned above, this is a good place to start.
Be sure your camera is set to continuous shutter so it takes multiple images if you hold the shutter release button down. Now, take a deep breath, steady your shooting hand and hold down the shutter release button until you hear/feel it take three images. Check them out and you’ll notice that they probably look similar to my Kauffman Center for the Performing Arts example above!! You did it!!
POST PROCESSING
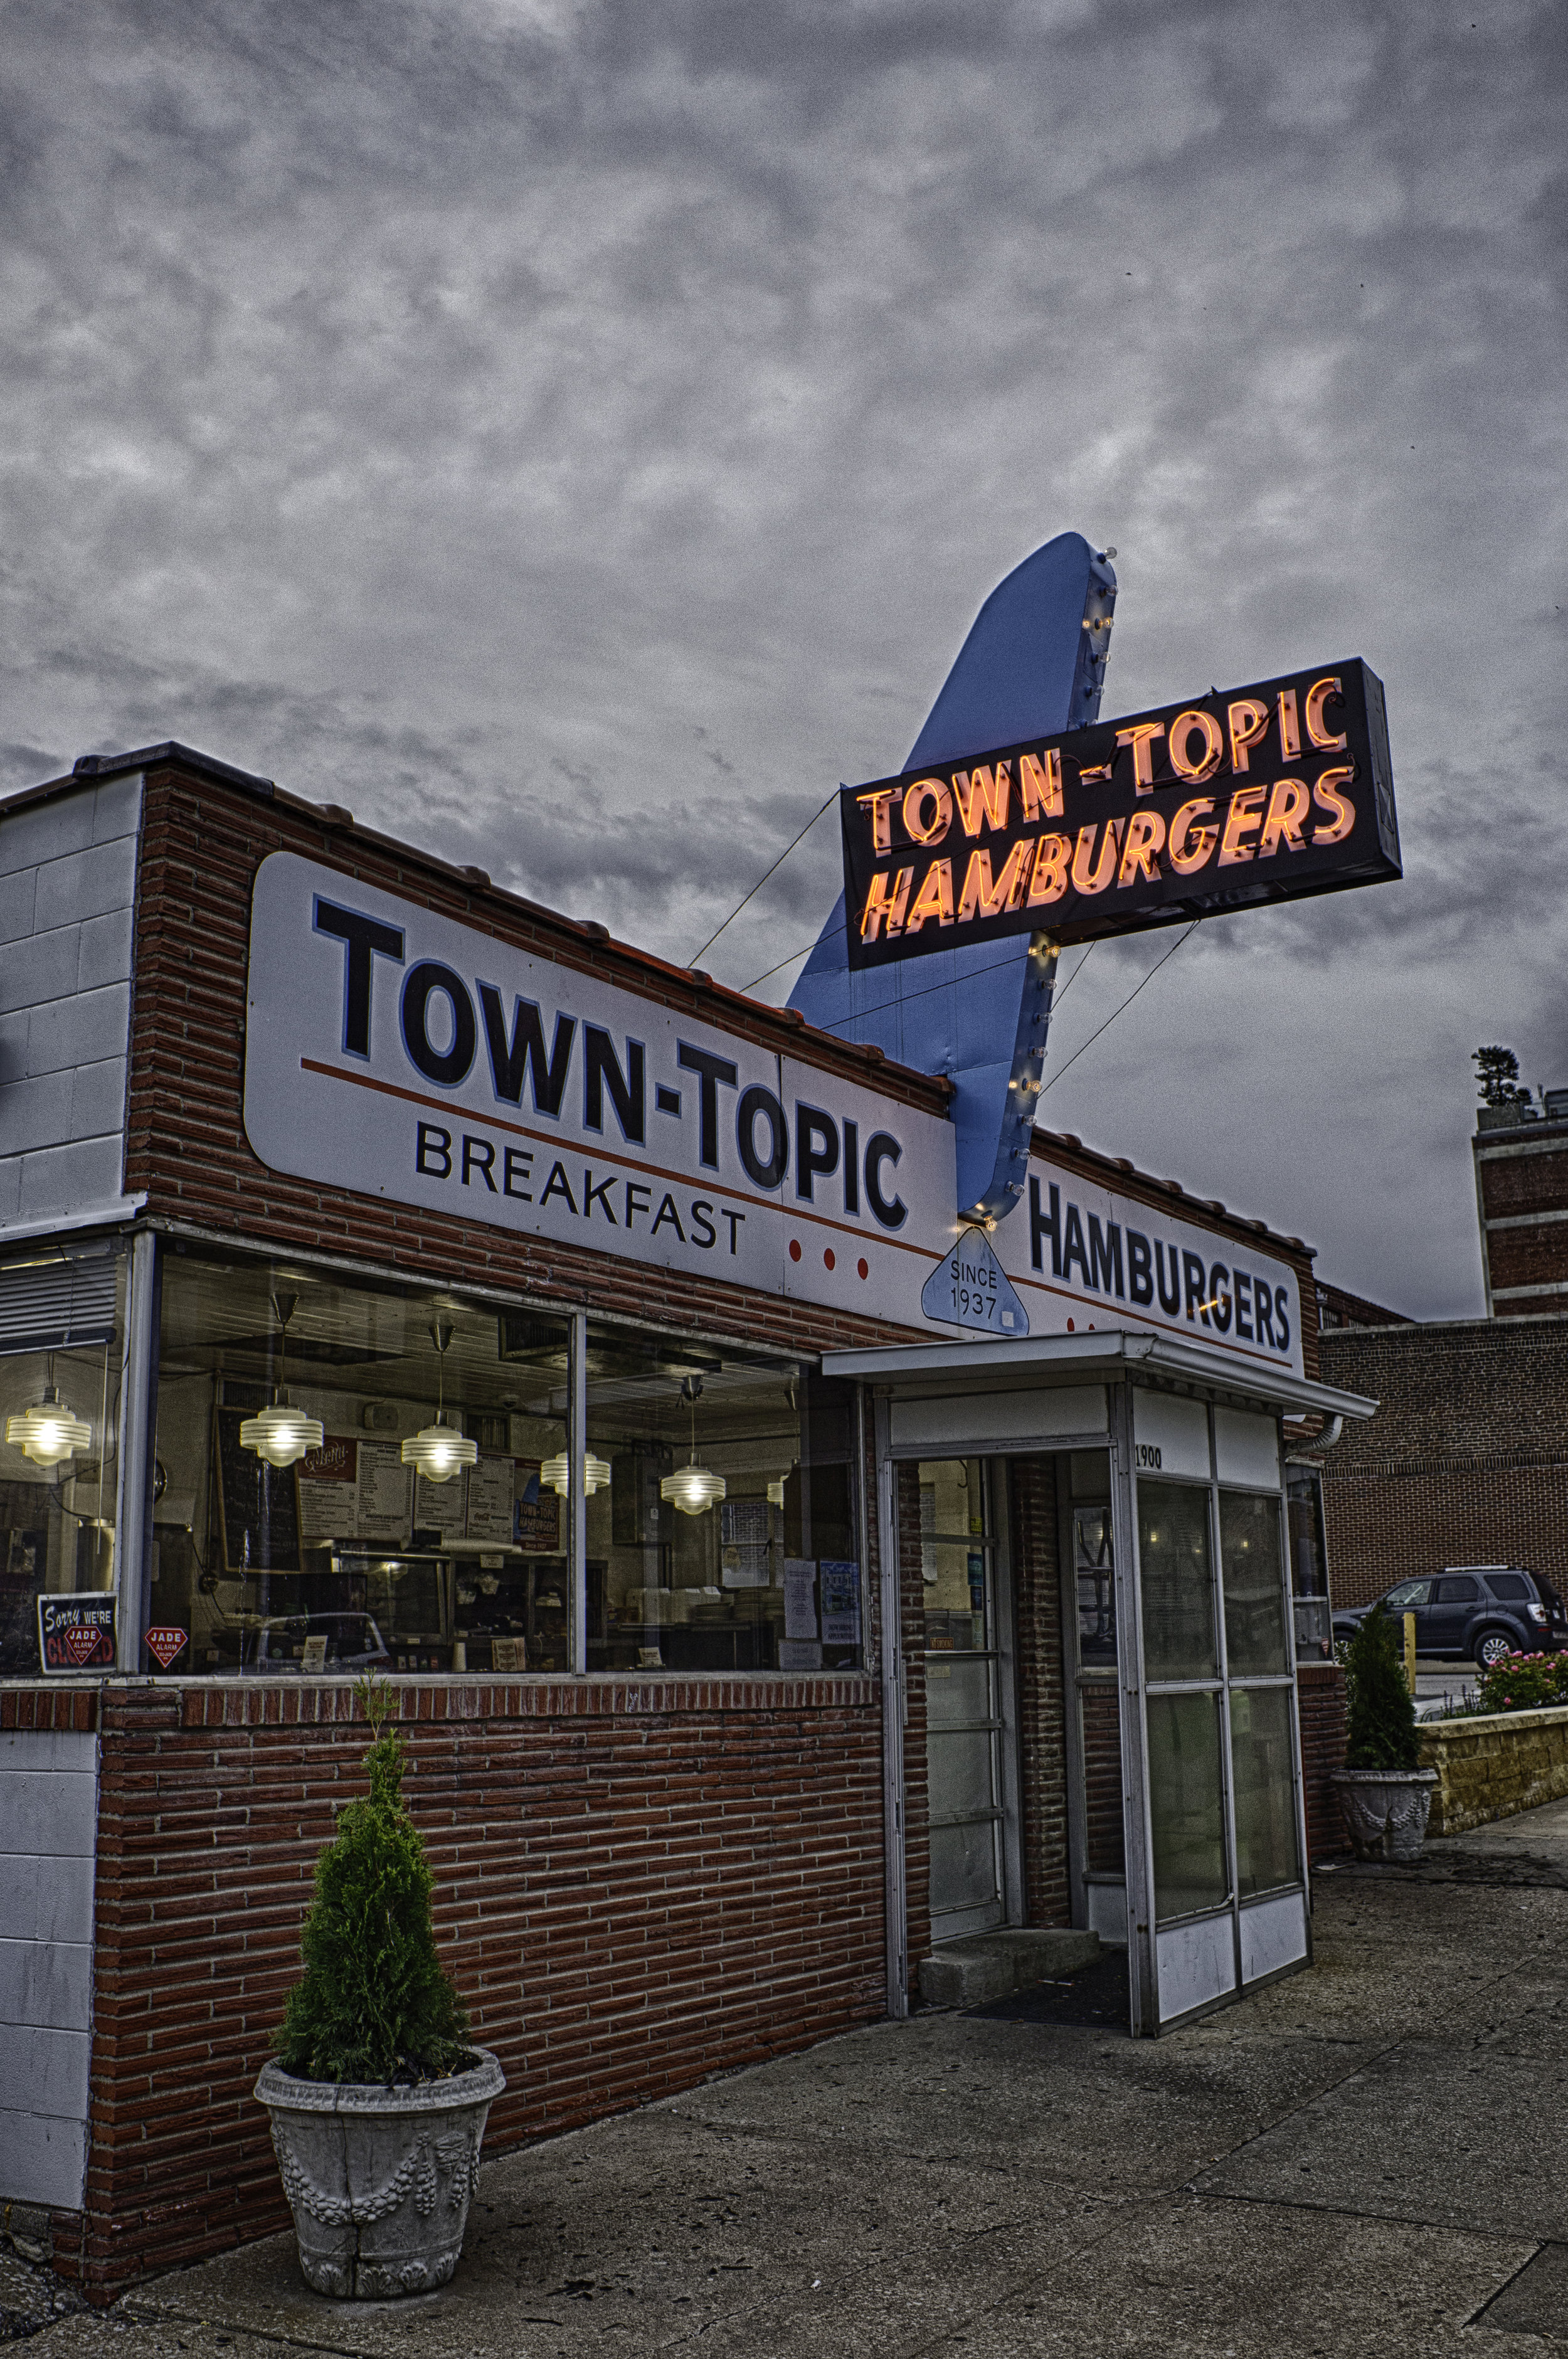 Town Topic | Kansas City, Missouri
Last but not least, I would be remiss if didn’t explain how to combine and edit your images. There are a plethora of ways but here is a brief overview of three of them (I highly prefer the third so feel free to skip to that).
Photoshop:
- Click File > Automate > Merge to HDR Pro
- Browse to select your images and click Okay
- Make whatever adjustments you’d like in the pop-up window and click Okay
- Save your image
Lightroom:
- Select the images you want to combine
- Right click > Photo Merge > HDR
- Make your adjustments and click Merge
Lightroom + HDR Effects Pro (Google Nik Collection):
- Download this FREE software (used to be owned by Nikon, hence the name ‘Nik’) via the button in the top right corner
- Follow the instructions to install on your computer (you will be able to use this in both Photoshop and Lightroom, I just prefer Lightroom at the moment)
- Open Lightroom and select the images you want to combine
- Right click > Export > HDR Effects Pro 2 (not sure why you have to ‘export,’ but it is what it is)
- If you took the images hand-held, be sure the Alignment, Ghost Reduction and Chromatic Aberration boxes are checked. If you shot with a tripod, you can un-check the Ghost Reduction box if you want
- Click Create HDR
- Select from the incredible presets on the left side and make your additional adjustments on the right
- Click Save!!
- The image will show up in the original folder as a TIFF file
- To use this software in Photoshop, install it and then click File > Automate > Merge to HDR Effects Pro 2 and follow these same steps
I would love to see what you create (hello@kira-whitney.com)!! Was this article helpful?! Leave me a comment below!
Leave a Reply

the list
Be the ultimate insider. Get updates on my latest shoots, tips for planning your dream photo session & where I'm headed next. My email subscribers always hear about big updates before anyone else!
JOIN THE FUN

education Community
Are you a creative entrepreneur? Come join my small but mighty education community, where we are learning and growing together! I'm an open book and love to share about all the photography & business stuff behind-the-scenes stuff here!
Let's Grow Together!
That’s good stuff, great imagery.